How to Change Back Shocks in Three Simple Steps
If your vehicle’s back shocks are worn out or causing a bumpy ride, you’re not alone. Many people struggle with changing shocks themselves and often feel overwhelmed by the process. But don’t worry—replacing your back shocks can be straightforward if you follow a few simple steps.
To change your back shocks in three simple steps, first, lift and secure your vehicle on a level surface. Then locate and loosen the bolts holding the old shocks, carefully detach them, and remove the units.
Next, align and attach the new shocks, tightening all bolts to the manufacturer’s torque specifications.
Finally, double-check everything is secured properly and perform a quick test drive.
If you want to master each step, keep going to get all the details.
Key Takeaways
- Lift the vehicle securely on level ground and remove the rear wheels partially to access the shocks.
- Loosen and remove the shock mounting bolts carefully, noting their positions.
- Attach the new shocks to the mounting points, making sure they’re properly aligned, then tighten the bolts to the manufacturer’s specs.
- Reinstall the rear wheels, lower the vehicle, and fully tighten the lug nuts.
- Finally, test the shocks for smooth operation and double-check that all bolts are securely tight.
Getting Your Vehicle Ready for Shock Replacement
Before you start replacing your back shocks, it’s key to get your vehicle ready properly. Begin by inspecting the suspension system so you can see how shocks impact ride quality.
Proper preparation ensures safe, efficient back shock replacement and optimal ride quality.
It’s also helpful to know the differences between shock types, like gas-filled or hydraulic, to pick the right replacements for your needs.
Make sure your vehicle is on a flat, stable surface and engage the parking brake. Loosen the lug nuts on the rear wheels but don’t take them all the way off yet.
Lift the vehicle with a jack and secure it with jack stands. Clear the workspace of any debris or obstacles, so everything is safe and tidy.
Taking these steps helps prevent accidents and makes the shock replacement process easier. Proper preparation also helps avoid unnecessary damage.
Understanding shock absorber differences allows you to make informed choices, whether you’re aiming for better comfort, handling, or suspension upgrades.
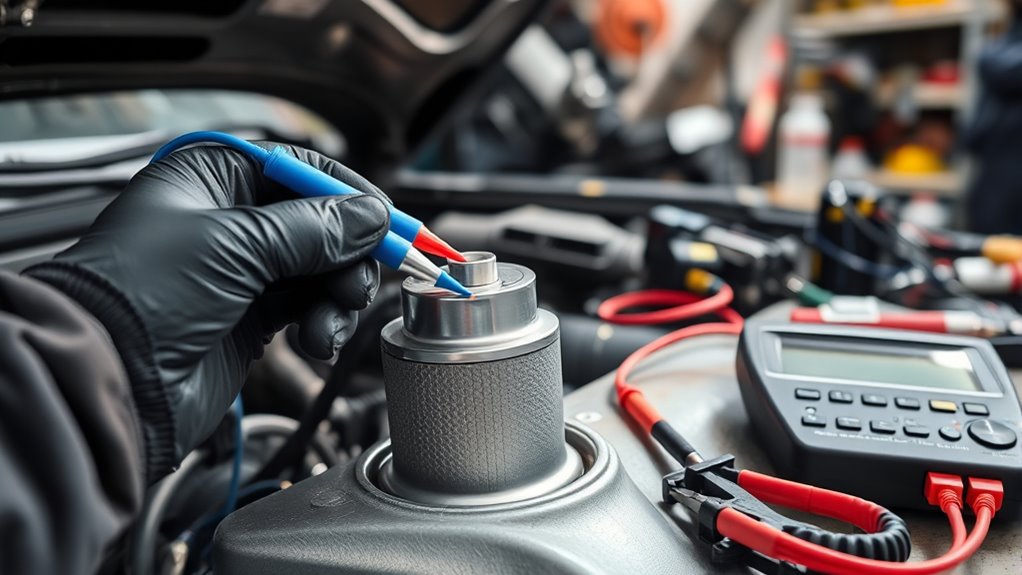
What Tools and Safety Gear You Need
Equipped with the right tools and safety gear, you’ll make the shock removal process safer and more efficient. You’ll need basic hand tools like a socket set, wrenches, and a jack to lift your vehicle.
If you’re thinking about suspension upgrades or exploring different shock absorber types, having the right tools makes the process smoother. Safety gear is just as important—wear gloves to protect your hands and safety goggles to shield your eyes from debris.
A torque wrench helps you tighten bolts to the manufacturer’s specifications. If your shocks are rusty or stubborn, penetrating oil can make removal easier. Always secure your vehicle on level ground and use jack stands for stability.
Knowing which shock absorber types you’re working with helps determine the necessary tools and approach. Having these tools and safety gear ready minimizes the risk of accidents and streamlines the job.
This makes it easier to successfully replace your back shocks and get your vehicle back on the road safely.
How to Choose the Correct Back Shocks for Your Vehicle
Choosing the right back shocks depends on your vehicle’s make, model, and how you drive. Think about how much shock absorption you need—whether it’s for daily driving, off-road adventures, or towing.
Your suspension system’s design also plays a role in determining compatible shocks. To make it clearer, here’s a quick comparison:
| Vehicle Type | Shock Absorption Needs | Suspension System Compatibility |
|---|---|---|
| City car | Moderate | MacPherson strut or coilover |
| Off-road SUV | Heavy-duty | Heavy-duty or monotube shocks |
| Towing vehicle | High | Heavy-duty or adjustable shocks |
| Sports car | Precise, responsive | Performance shocks |
| Light truck | Versatile | Twin-tube or monotube |
Matching shocks to your vehicle ensures your suspension performs well, smoothing out your ride and keeping you safe.
Step-by-Step Guide to Remove Old Shock Absorbers
First, you’ll want to gather all the tools you’ll need before you start. It’s always easier when you’ve got everything at hand instead of scrambling around later. After that, safely lift and secure your vehicle so you can get good access to the shock absorbers — safety first, right? Once it’s up, you can go ahead and remove the shock mounts, which will let you free the old shocks and make way for the new ones.
Gather Necessary Tools
Before you start removing the old shock absorbers, it’s important to gather all the necessary tools to make the process smooth. Having everything ready will make your suspension upgrade easier and safer.
You’ll need a jack and jack stands to lift and support your vehicle securely. Wrenches and socket sets are essential for loosening and removing bolts connecting the shock absorber.
A torque wrench is helpful for properly tightening the new components. Penetrating oil will help loosen rusted or stubborn bolts.
Don’t forget work gloves and safety glasses to protect your hands and eyes during the job. Having the manufacturer’s manual nearby is also a good idea for specific torque specs and removal instructions.
Gathering these tools now will keep things efficient and help avoid frustrating delays later.
Lift and Secure Vehicle
To safely remove your old shock absorbers, you first need to lift the vehicle off the ground and secure it properly. Begin by doing suspension diagnostics to identify what type of shock absorbers you have on your vehicle.
Depending on whether your shocks are coil spring, twin-tube, or monotube, you’ll need to use the correct lifting points. Use a hydraulic jack to lift the vehicle and then place jack stands under secure lift points; don’t just rely on the jack.
Make sure the vehicle is stable before you start working underneath it. Securing your vehicle helps prevent accidental slips and keeps your workspace safe.
Proper lifting and securing are key steps before moving on to remove your shocks. Also, suspension diagnostics will help you determine the best way to remove your specific shocks.
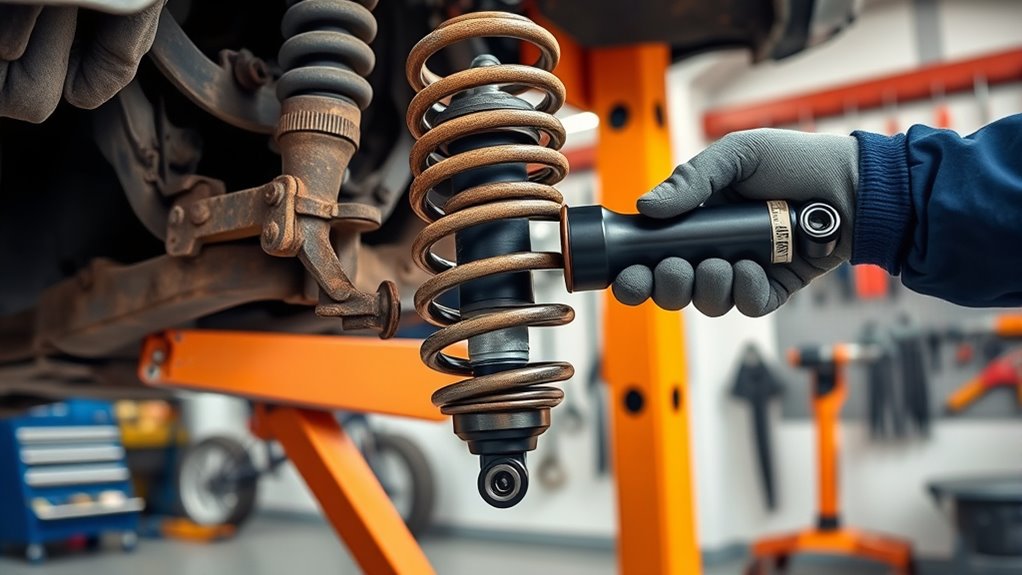
Remove Shock Mounts
Removing the shock mounts is pretty straightforward once the vehicle is securely lifted. First, locate the brackets that hold the shock absorbers in place.
Use a wrench to loosen and take out the bolts securing the shock to the brackets. Be prepared for some residual shock fluid that might leak—keep a rag handy to clean it up.
Keep track of the bolts and brackets so you don’t lose anything during reinstallation. If the shock is stuck, applying a penetrating lubricant can help loosen it up.
Carefully detach the shock from the brackets, making sure not to damage nearby parts. Once the shock is free, inspect the brackets for damage or rust and get everything ready for installing the new shocks.
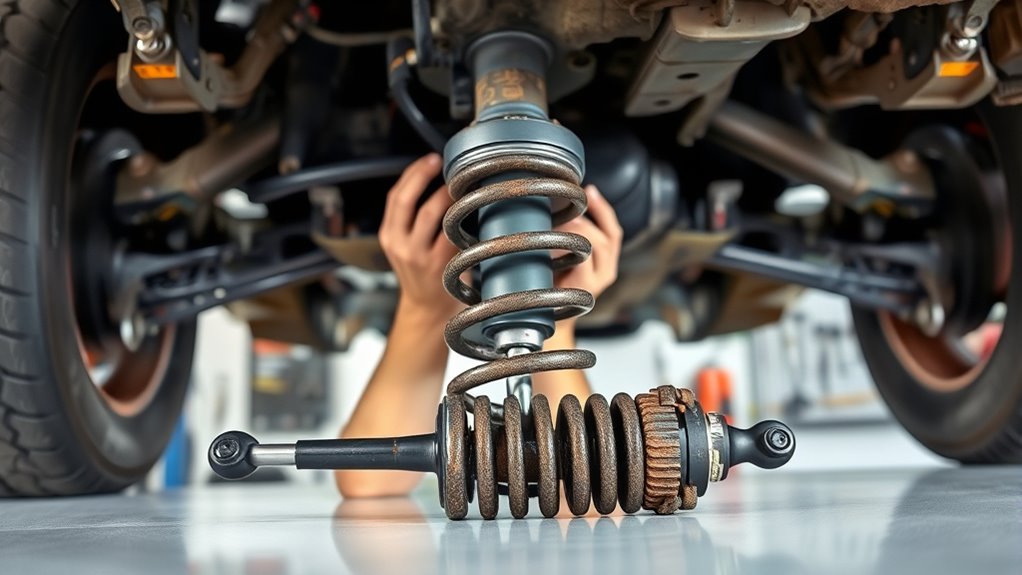
How to Install Your New Back Shocks Properly
Installing your new back shocks correctly is crucial for a smooth ride and good handling. Start by lining up the shocks with the mounting points, making sure they fit snugly into the brackets.
Before tightening anything, check the shock fluid level if your shocks have fluid. Top it off if needed—it helps ensure the best damping and performance.
Next, if your shocks have adjustable springs, loosen the spring tension first. Carefully compress the spring onto the shock body before tightening everything up.
Make sure to adjust the spring tension evenly on both sides to keep everything balanced. Once everything looks good and all bolts are secure, double-check that everything’s tight.
Taking your time during installation helps prevent future issues and prolongs the life of your shocks. When done right, they’ll make your ride smoother and your handling more predictable.
Tighten and Secure Your Shocks Like a Pro
Once you’ve aligned and inserted the shocks into their mounts, the next step is to tighten and secure them properly.
Use a torque wrench to verify you tighten the bolts to the manufacturer’s specifications. That’s essential for safety and performance.
As you tighten, double-check that the shocks are aligned correctly and seated evenly. Securing the shocks tightly prevents any unwanted movement or noise and maintains maximum ride comfort.
Keep in mind that over-tightening can damage the components, so stay within recommended torque limits.
If you’re filling the shocks with new shock fluid, make sure it’s at the correct level before fully securing everything.
Properly tightened shocks help absorb bumps efficiently, delivering a smoother ride and better handling.
Take your time during this step—secure bolts properly, but don’t rush to ensure your vehicle’s back shocks work flawlessly.
How to Make Sure Your Shocks Are Installed Correctly
To ensure your shocks are installed correctly, start by checking that they’re properly aligned. When shocks are aligned just right, they’ll work smoothly, and you’ll avoid uneven tire wear—that’s a surefire way to keep things running smoothly.
Next, take a moment to double-check that all the mounting bolts are tight and secure. Loose bolts can lead to rattling or even damage over time, so it’s worth making sure everything is snug.
Getting the installation right makes a big difference. It not only guarantees a more comfortable ride but also helps your shocks last longer. So, take your time and double-check those details!
Check Proper Alignment
To guarantee your shocks are installed correctly, start by verifying they are properly aligned with the mounting points. Misaligned shocks can cause uneven tire wear and poor suspension performance.
To ensure correct positioning:
- Double-check that the shocks match the manufacturer’s specifications.
- Confirm the mounting bolts are securely tightened without over-tightening.
- Perform a visual inspection to see if the shocks sit straight and flush against the mounting brackets.
- After installation, get a professional wheel alignment to maximize suspension tuning and prevent uneven tire wear.
Proper alignment ensures your suspension functions smoothly and extends the lifespan of your shocks. If anything looks off, recheck the mounting and consider a wheel alignment service to maintain safe, peak driving.
Verify Secure Mounting
Ensuring your shocks are securely mounted is essential for safe and effective suspension. Proper installation guarantees the best shock absorption and helps keep your suspension working with your vehicle.
After installing the shocks, double-check that all bolts and fasteners are tight and properly seated. Loose mounting points can reduce shock performance and compromise safety.
| Inspection Step | What to Look For | Result |
|---|---|---|
| Visual Check | No gaps or misalignments | Secure mounting |
| Torque Measurement | Bolts tightened to manufacturer specs | Proper fit |
| Movement Test | Shocks move smoothly, no play | Correct installation |
Make sure to verify each aspect to ensure your shocks are installed correctly for a smoother, more reliable ride.
Tips to Maintain Your Shocks and Extend Their Lifespan
Regularly inspecting your shocks for signs of wear or leaks can help catch problems early before they lead to more extensive damage. Proper suspension maintenance ensures your shocks work well and last longer. Staying aware of issues allows you to address them quickly, saving you money and keeping driving safe.
Here are some tips to help extend your shocks’ lifespan:
- Check for oil leaks or dirt buildup around the shocks.
- Listen for unusual noises while driving—they can be a sign of wear.
- Keep your suspension parts clean and free from debris.
- Use vehicles compatible with advanced shock technology for better durability.
Troubleshooting Common Shock Replacement Problems
Replacing shocks can sometimes bring unexpected challenges, even if you’ve stayed up-to-date on maintenance. You might find it tough to remove the shock absorber because of stubborn spring compression or seized bolts. Common issues include the shock not fitting properly or getting stuck in the mounting points. Staying calm and patient while tackling these problems saves time and helps prevent damage.
Here’s a quick rundown of typical issues:
| Problem | Cause | Solution |
|---|---|---|
| Shock won’t fit | Incorrect alignment | Double-check the mounting points |
| Spring compression interference | Worn spring tension | Use spring compressors carefully |
| Bolts stuck or seized | Rust or corrosion | Apply penetrating oil |
| Shock absorber leaks | Wear and tear | Replace with a new unit |
Remember to stay patient. Handling these common issues properly makes your replacement smoother and safer.
When It’s Time to Get Professional Help
Sometimes, despite your best effort, tackling shock replacement tasks may become more difficult or risky than anticipated. If you notice persistent issues with suspension upgrades or experience compromised off-road performance, it’s time to seek professional help.
Don’t push through if you encounter difficulty removing or installing shocks safely, unusual noises or vibrations after replacement, inconsistent ride quality or handling, or persistent suspension sagging or imbalance.
Professional mechanics have the specialized tools and expertise to handle complex shock replacements correctly. They can also ensure your suspension is optimized for off-road performance or upgrades.
Trying to do repairs beyond your skill level might cause more damage or compromise safety. When in doubt, consulting an expert ensures your vehicle maintains proper handling, ride comfort, and off-road capability.
Frequently Asked Questions
How Often Should I Replace My Vehicle’s Back Shocks?
You should replace your back shocks every 50,000 to 100,000 miles, but this can vary based on your driving habits and any suspension upgrades you’ve made.
Regularly check for signs like excessive bouncing or uneven tire wear. Doing a quick road test can help spot issues early on.
If you notice handling problems or unusual noises, it’s a good idea to replace your shocks sooner to keep your ride smooth and stay safe.
Taking good care of your suspension helps it perform at its best for longer.
Can I Replace Shocks Without Lifting the Vehicle?
You can replace shocks without lifting the vehicle, but it’s tricky and not recommended for safety reasons. If you decide to do it, make sure to use proper lifting tools like jacks and jack stands, and always follow safety precautions.
Ensure your vehicle is stable before working underneath it. Keep in mind that getting to the shocks without lifting can be tough, which increases the risk of injury or improper installation.
Safety should always come first, so if you’re unsure or uncomfortable, it’s best to lift the vehicle properly or seek professional help.
What Are Signs My Shocks Need Replacing?
If your suspension wears out, you’ll notice your ride comfort drops. You might feel more bumps and jolts while driving.
Signs your shocks need replacing include excessive bouncing after hitting bumps, nose diving during braking, and uneven tire wear.
These signs show the shocks can’t absorb impacts properly, which can hurt safety and handling.
It’s time to replace them when you notice these symptoms to keep your ride smooth and maintain control.
Are There Different Shock Types for Specific Driving Conditions?
Yes, there are different shock absorber types designed for specific driving conditions.
For instance, coil shocks are great for tackling rough terrains and off-road adventures. Gas shocks, on the other hand, offer better stability when you’re on highways and city streets.
You should choose shock absorber types based on what kind of driving conditions you’ll encounter. Picking the right one helps ensure peak performance and comfort.
Matching the right shock to your driving environment can also improve handling, ride quality, and safety.
How Long Does a Shock Replacement Typically Take?
Like fixing a leaky faucet, replacing shocks is surprisingly quick when you understand suspension maintenance. Typically, it takes about 1-2 hours, depending on your vehicle and shock absorber technology.
Skilled DIYers or mechanics can speed through this process, especially if the shocks are easily accessible. Keep in mind, proper installation guarantees your ride’s comfort and safety.
Conclusion
Replacing your back shocks might seem intimidating, but with the right tools and steps, you can do it yourself. Just take it step by step, and you’ll be surprised at how manageable it is.
Remember to prioritize safety and double-check your work for proper installation. A secure fit means a smoother, safer ride and better handling on the road.
Regular maintenance helps extend the lifespan of your shocks, saving you money in the long run. Keeping an eye on their condition is a smart move for your vehicle’s health.
Are you ready to give your vehicle the smooth ride it deserves? Taking charge of your car’s care, like changing the back shocks, not only boosts performance but also gives you confidence behind the wheel.