Which Way to Turn Oil Filter for Easy Removal
Getting that stubborn oil filter off can be a real headache. If you’ve ever struggled with tight or stuck filters, you’re definitely not alone.
Many people find removing oil filters to be one of the trickiest parts of an oil change.
To remove an oil filter easily, turn it counterclockwise (to the left).
Using the right tools like a filter wrench or pliers with rubber grips can give you better advantage.
Apply penetrating oil if it’s stuck, and wait a few minutes before trying again.
Avoid forcing it to prevent damage.
For more helpful tips and techniques on removing stubborn filters, keep exploring — there’s more to learn to make the job smoother.
Key Takeaways
- Turn the oil filter counterclockwise (to the left) to loosen and remove it.
- Use tools like a filter wrench or pliers to get a better grip and leverage.
- Spray penetrating oil and wait 10-15 minutes to help loosen stuck or rusted filters.
- Gently tap around the filter with a rubber mallet if needed to help break the seal.
- Be careful not to over-tighten when reinstalling to avoid damage and make sure it fits properly.
Do You Turn the Oil Filter Left or Right?
When removing an oil filter, you typically turn it counterclockwise, or to the left. The oil filter orientation usually doesn’t affect which way you turn it—standard filter rotation is always to unscrew it counterclockwise.
Most oil filters are designed with threads that follow this rule, making removal straightforward if you turn it the right way. Keep in mind, some vehicle models or specific filters might have different setups, but generally, turning the filter to the left will loosen it.
As you apply force, make sure you grip the filter firmly and turn slowly to avoid damaging the housing or stripping the threads. Once it starts to loosen, you can turn it more easily by hand or with a filter wrench.
Knowing the filter rotation direction and oil filter orientation helps you remove it efficiently and prevents unnecessary complications.
How to Identify Which End of the Oil Filter Is Outer | Inner
Sure! Here’s a more conversational version of the provided text:
—
If you’re trying to figure out which end of the oil filter is outer or inner, a good starting point is to look at it closely. Check for any markings, labels, or arrows that might give you clues. Sometimes, manufacturers put some info right on the filter itself.
Now, get a feel for the filter too. Usually, the outer surface is smooth to the touch, while the inner end might feel a bit rubbery or have grooves. By comparing these parts, you can easily tell which side is which. This little inspection will help you get the right end for removal or installation—simple as that!
Visual Inspection Techniques
Identifying which end of the oil filter is the outer surface and which is the inner can be straightforward with a quick visual inspection. Look closely at the filter’s ends for key differences.
The end with the oil filter gasket usually has a rubber seal that sits flush against the oil filter housing when installed. The other end is typically flat and smooth.
Check for these signs:
- Oil filter gasket: A visible rubber ring on one end
- Outer surface: Usually textured or threaded for a tight fit
- Inner can: Often smooth or with small drainage holes
- Sealing surface: Ridges or beads to ensure a proper seal
- Attachment points: Threads or clips for secure fitting
Outer vs. Inner Marks
Wondering how to tell the outer end of an oil filter from the inner? It’s simple once you look for specific markings.
Many oil filter myths suggest that the outer side always faces outward with visible threads or branding. But the inner side often has a rubber gasket or sealing surface.
To identify which end to turn for easy removal, check these marks carefully:
| End Type | Features | How to Recognize |
|---|---|---|
| Outer | Branding, Threads, or Markings | Usually has printed info or ridges |
| Inner | Gasket or Flat Sealing Surface | Rubber gasket or smooth surface |
| Tips | Don’t confuse outer with inner to avoid filter cleaning mistakes |
Knowing these details helps prevent common oil filter myths and ensures proper removal.
Physical Contact and Texture
Touching and feeling the ends of the oil filter can give you helpful clues about which side is which. The outer edge usually feels rougher and is designed for a better grip, making it easier to remove.
The inner part, where the filter connects to the engine, tends to feel smoother or more solid because of the filter material. You might notice it’s firmer or more rigid compared to the outer side.
Check out any patterns or marks on the ends that can indicate the outer shell. When you press on the ends, softer or more flexible areas usually mean they’re on the outside.
Feeling these tactile cues can really help you identify the correct side for removal.
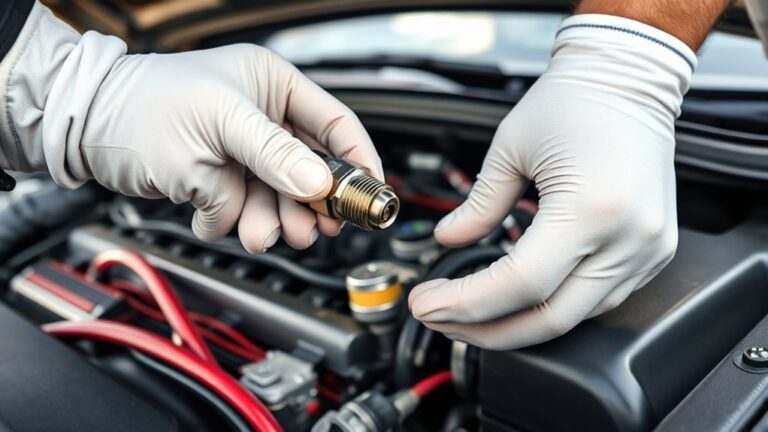
How to Remove an Oil Filter Step-by-Step
Removing an oil filter might seem tricky at first, but with the right approach, it’s pretty straightforward. First, locate the filter and gather your tools, like an oil filter wrench. Before you start, check your vehicle’s guide or symbols to see which way to turn for easy removal.
Use gloves and have a container ready because oil will probably spill. Follow these simple steps to do it safely and efficiently:
| Step | Action | Tip |
|---|---|---|
| 1 | Pump the filter gently to loosen it | Turning clockwise tightens; counterclockwise loosens |
| 2 | Remove with a filter wrench | Use the wrench carefully |
| 3 | Place the used filter in a disposal bin | Follow proper disposal rules |
| 4 | Clean the mounting surface | Get it ready for the new filter |
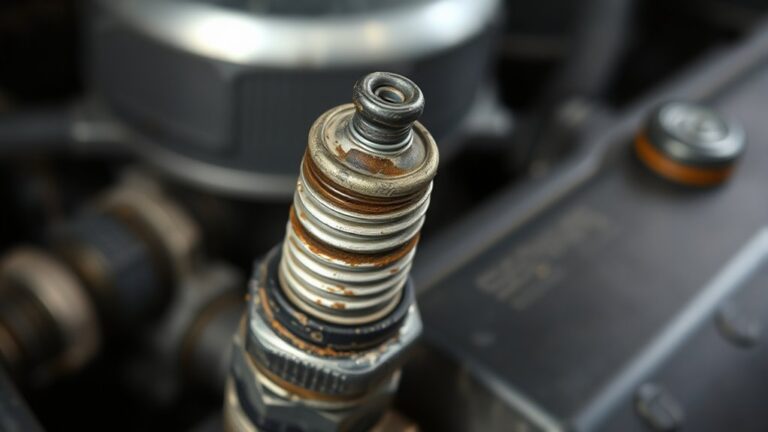
Signs Your Oil Filter Is Stuck or Difficult to Remove
If your oil filter feels stubborn or won’t budge despite applying usual effort, it’s a clear sign that it’s stuck or difficult to remove. You might notice it resisting turning even with a wrench or slipping when you try to grip it.
Several signs can alert you to this issue: the filter feels unusually tight or jammed against the engine. It’s more difficult to turn than typical oil filter brands or models.
You might notice damage or deformation on the oil filter materials after attempts. The filter spins but doesn’t loosen easily, indicating corrosion or thread seizing. Resistance persists despite using proper tools or techniques, often caused by age or improper installation.
These signs are common with certain oil filter materials and brands that might create tighter seals over time. Identifying these issues early helps you prepare for effective removal without damaging components.
Tips for Loosening a Stubborn Oil Filter
When a stubborn oil filter refuses to come loose despite your efforts, the right techniques can make all the difference. First, carefully locate the oil filter’s exact position, considering your vehicle’s typical filter location.
Knowing whether you have a spin-on or cartridge filter helps you choose the best removal method. Use a filter wrench designed for your filter type, and try turning counterclockwise.
If it’s stuck, apply gentle, steady pressure rather than forceful twisting, which can cause damage. Applying a little penetrating oil around the base of the filter and letting it sit for a few minutes can loosen stubborn grime.
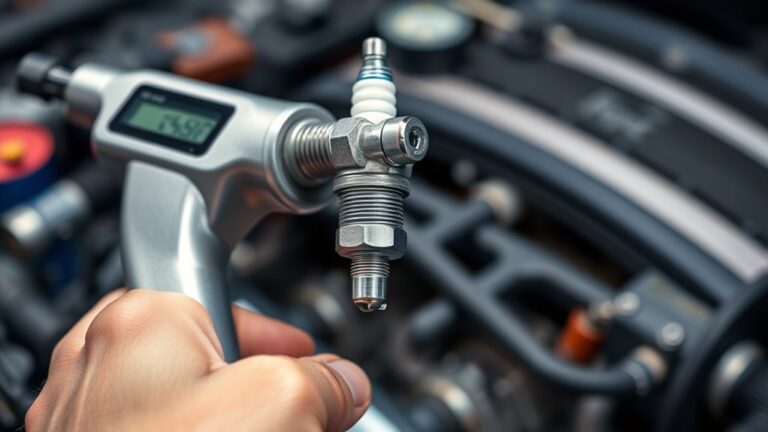
The Best Tools to Remove an Oil Filter Easily
Using the right tools can make removing an oil filter much easier. The proper tools help ensure your oil filter fits and make the job cleaner, reducing frustration and the risk of damage.
A quality oil filter wrench is essential because it fits different filter sizes and shapes, giving you the grip needed to turn stubborn filters. Rubber gloves or a rag can keep your hands clean and give you extra grip.
An oil catch pan is handy for catching residual oil, making disposal easier and more environmentally friendly. A ratchet and socket set can reach tight spaces and handle larger filters with ease.
Finally, a filter removal strap offers a flexible option for tight spots, helping you avoid struggles or damaging the filter. Using these tools makes removal smoother and helps manage oil waste responsibly.
Plus, they support proper disposal methods and ensure full compatibility with your vehicle’s oil filter.
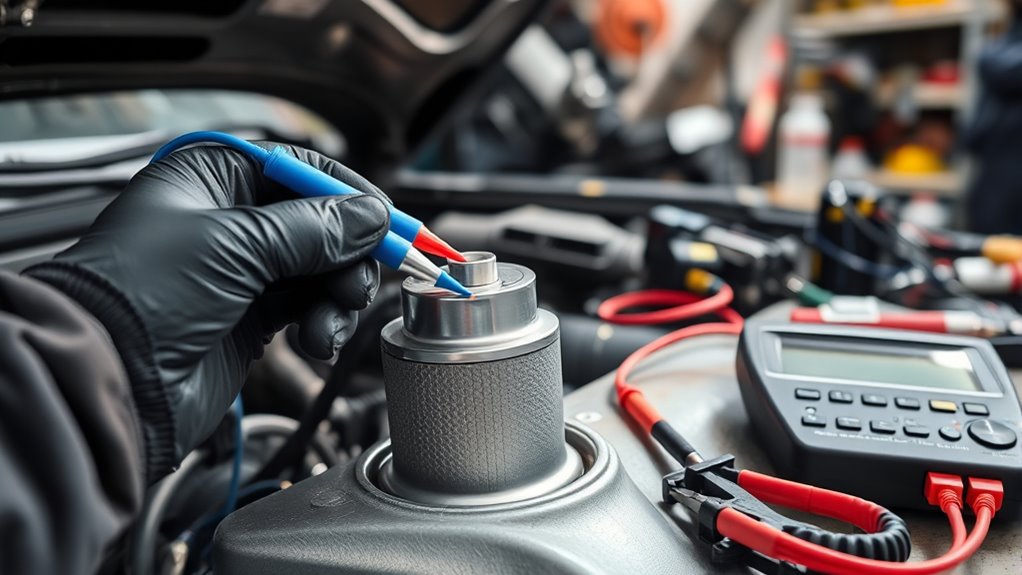
What to Do if Your Oil Filter Gets Stuck or Won’t Turn | Breaks | Seizes Up
A stuck or seized oil filter can be really frustrating, especially if it refuses to turn or come off during removal. If that happens, don’t force it because you could damage the engine or make a mess.
Start by spraying some penetrating oil like WD-40 around the base of the filter. Let it sit for about 10-15 minutes to help loosen any corrosion or debris holding it in place.
Spray penetrating oil around the filter base and wait 10-15 minutes to loosen corrosion and debris.
Next, use a strap wrench or pliers for a better grip, turning counterclockwise. If it still won’t budge, gently tap around the filter with a rubber mallet to help loosen it further.
Remember to dispose of the old filter responsibly, following your local regulations on oil filter disposal. Also, be aware of the type of engine oil you’re using, as some oils can cause more build-up, increasing the chances of a stuck filter.
Patience is key. Forcing it can cause damage, so work slowly and carefully to remove the filter without breaking it.
Safety Tips for Removing an Oil Filter Safely
Before you start removing the oil filter, double-check that you’ve got all the right tools on hand. It’s also a good idea to put on some protective gloves and goggles—these will help keep you safe from hot oil or any debris that might splash around.
Next, make sure your vehicle is secure. Park it on a flat surface, then engage the parking brake. This way, you won’t have to worry about it moving unexpectedly while you’re working on it. Taking these simple steps will help make the whole process safer and way easier.
Use Proper Tools
To remove an oil filter safely, it’s important to have the right tools on hand. Using proper oil filter tools makes the job easier and helps prevent damage to your filter or engine.
Tools like oil filter wrenches, strap wrenches, and pliers designed for access are key. They give you a better grip and more control, especially in tight spots.
Always pick the correct size and type of tool for your filter. Using the wrong ones can lead to slipping, stripping, or even accidents.
Keep your workspace organized, and check that your tools are in good shape. Mastering the proper use of these tools makes the process safer, quicker, and less frustrating.
Some useful tools include oil filter wrenches for a secure grip, strap wrenches for stuck filters, and pliers with rubberized grips. A socket set with an extension and a properly sized screwdriver can also help.
Wear Protective Gear
Wearing protective gear is crucial to keep yourself safe from hot oil, splashes, and debris when removing an oil filter. Always wear gloves to prevent burns from hot oil and protect your hands from sharp edges or grime.
Safety goggles are essential to shield your eyes from splashes, especially if the oil filter’s orientation could cause spills. A long-sleeved shirt can help minimize skin contact.
Knowing the oil filter orientation helps prevent accidents by allowing you to plan your removal carefully. This reduces the risk of sudden sprays or slips.
Prioritize protective gear at every step to avoid injuries and make the process safer. These precautions help you stay safe while efficiently removing the oil filter.
Secure Vehicle Position
How do you guarantee your vehicle won’t move unexpectedly while removing the oil filter? Start by securing the vehicle stance. Use wheel chocks on the front and rear tires to prevent rolling. Place the car in park or gear if manual, and engage the parking brake firmly.
For uneven surfaces, block the wheels on the opposite side of your work area. Consider using jack stands for extra stability, especially if working underneath. Remember, the oil filter type—spin-on or cartridge—can influence your approach, so verify the vehicle is perfectly stable before loosening.
- Chock all wheels securely
- Use jack stands if necessary
- Engage the parking brake fully
- Work on a flat, stable surface
- Double-check the vehicle stance before proceeding
Common Mistakes to Avoid When Changing Your Oil Filter
Many car owners overlook common mistakes that can make changing your oil filter more difficult or even cause damage. One key mistake is neglecting proper oil filter placement; installing it the wrong way can lead to leaks or poor filtration. Always double-check that the filter is correctly aligned and securely tightened.
Ensure proper filter placement and secure tightening to prevent leaks and ensure effective filtration.
Ignoring filter compatibility is another common mistake. Using a filter not designed for your vehicle might cause fitment issues or sealing problems. It’s important to ensure you’re using the right filter for your car.
Before removal, take a moment to prep the area—this helps prevent dirt and debris from falling into the engine. Forgetting to lubricate the gasket before installing the new filter can make it loosen early.
Over-tightening the filter can distort the rubber seal, which may cause leaks later on. So, tighten it just enough to secure it without forcing it.
Troubleshooting Persistent Oil Filters: Your Next Steps
Having trouble removing a stuck oil filter? That’s pretty common, and it usually means the filter is really snug. First off, try grabbing a filter wrench—that tool is designed to grip the filter securely and make it easier to turn. If that doesn’t do the trick, a little bit of penetrating oil around the base can help loosen things up.
But if the filter still won’t budge, don’t yank on it forever or risk damaging your engine. Instead, think about some alternative removal techniques. Sometimes, using a strap wrench or even tapping around the filter gently with a rubber mallet can loosen it without causing any harm. Just take it slow and steady—you’ll get it off without frustration or damage.
Identifying Stuck Filter Issues
When a stubborn oil filter refuses to budge, it’s important to figure out what’s causing the problem before you try to remove it. Common issues include filters that are tightly sealed or have worn or damaged threads.
You might notice the filter is unusually hard to turn or has been on for a long time. Some brands tend to stick more because of their quality, and thick or old oil can also make loosening tricky.
To troubleshoot, consider factors like excessive torque during the last change, corrosion or rust on the threads, or old, hardened oil residue around the seal. The filter’s age or extended use, and manufacturer design differences that affect grip, can also be factors.
Knowing these issues helps you come up with the best plan for removing the filter successfully.
Effective Removal Techniques
To effectively remove a stubborn oil filter, start by trying to loosen it with a proper filter wrench, making sure you’re turning it in the correct direction.
If it’s still stuck, apply lubrication techniques like soaking the filter’s seam with penetrating oil or WD-40.
Let it sit for a few minutes to break down grime and oil buildup, making removal easier. During oil filter maintenance, verify you’re turning the filter counterclockwise to loosen, following the manufacturer’s instructions.
If it doesn’t unscrew, give it gentle taps with a rubber mallet to break the seal without damaging the housing.
Using these techniques minimizes damage and reduces frustration, making oil filter maintenance safer and more efficient.
Frequently Asked Questions
Can Using the Wrong Direction Damage the Oil Filter?
Using the wrong direction can damage the oil filter, especially if you force it. Proper installation is essential to prevent filter damage. Turning it clockwise usually tightens it, while turning it counterclockwise loosens it.
If you ignore this, you risk stripping threads or damaging the filter’s seal. This makes it harder to remove later and can cause leaks.
Always follow the manufacturer’s instructions to avoid damage. Doing so helps ensure a proper fit and keeps everything working smoothly.
Does the Oil Filter Require a Specific Tool for Removal?
Think of removing an oil filter like unfastening a treasure chest—you need the right key to succeed.
An oil filter socket is your trusted tool, making the removal technique straightforward. Using a specific tool not only simplifies turning the filter but also prevents slipping or damage.
How Often Should I Replace My Oil Filter?
You should replace your oil filter every 3,000 to 5,000 miles, depending on your vehicle’s oil change schedule.
The lifespan of the filter varies based on your driving habits and engine type, but regular replacement helps keep your engine running smoothly.
Keep an eye on your vehicle’s maintenance plan and don’t delay replacing the filter. This helps prevent contaminants from circulating and causing damage.
Changing your oil filter regularly keeps your engine clean and can help extend its overall lifespan.
Is It Necessary to Pre-Fill the New Oil Filter Before Installation?
You might think pre-filling the oil filter is just an extra step, but it actually helps your engine run smoother. It reduces dry starts and makes for quicker lubrication.
During installation, pre-fill the filter until it’s full. Then, drain a small amount to avoid spills. It’s a simple step that makes a difference.
Pre-filling helps maintain proper oil pressure, which can prolong your engine’s life. It also prevents potential startup issues that can happen with dry filters.
What Are Signs of a Leaking or Improperly Installed Oil Filter?
You’ll notice signs of a leaking or improperly installed oil filter like leaks around the filter, oil spots under your vehicle, or a low oil warning light. These issues usually point to installation problems.
If you see oil dripping after installation, double-check if the filter is properly tightened and seated. An improperly installed filter can cause leaks or a drop in oil pressure.
Make it a habit to inspect for signs of leaks regularly. If you notice any issues, replace the filter right away to prevent engine damage.
Conclusion
Just like handling a tricky maze, removing an oil filter requires patience and turning in the right direction. If you turn the wrong way or rush, you might get stuck or cause damage.
Remember to always identify the correct end of the filter and follow safe steps. Think of it as steering your vehicle through a tight bend—careful, steady, and knowing when to give it a gentle turn.
With practice, you’ll find your way quickly and confidently every time, making oil filter removal easier. When in doubt, always check which way to turn the oil filter for easy removal and avoid unnecessary hassle.