How Do You Wire a Fuel Gauge in 7 Essential Steps
Many people find wiring a fuel gauge a bit intimidating, especially if you’re new to automotive DIY. You’re not alone—getting that gauge to work correctly can feel like a puzzle. But don’t worry, with some basic steps, you can tackle this project confidently.
To wire a fuel gauge in 7 essential steps, start by gathering your tools and understanding the key components. Locate the fuel sending unit and power source, then connect the sending unit to the gauge’s signal terminal.
Properly wire the power supply and grounding points, ensuring all connections are secure and clean. Test the setup by checking if the gauge responds accurately.
Keep troubleshooting tips in mind to fix common issues—more detailed instructions will guide you through each stage.
Key Takeaways
- Gather all the necessary tools and a color-coded wiring harness before starting. This keeps things organized and helps you wire safely.
- Find the fuel sending unit and check its wiring and power connections to make sure everything’s correct.
- Connect the sending unit wire to the gauge’s signal terminal and ground it properly to the chassis for a good connection.
- Power the gauge by linking it to a 12V supply with fuse protection, making sure the connections are secure and insulated.
- Finally, test the system with fuel to see if the gauge reads accurately and the needle moves smoothly.
Gather Your Tools and Materials for Fuel Gauge Wiring

Before you start wiring your fuel gauge, make sure you have all the necessary tools and materials. A multimeter is essential for testing connections and ensuring everything works properly.
Get the right gauge wiring harness, usually color-coded for easy identification—red for power, black for ground, and yellow or white for signal. You’ll also need a screwdriver, wire strippers, crimp connectors, and electrical tape or heat shrink tubing to insulate your connections.
Check that your tools are clean and in good condition. Properly calibrated tools, especially your multimeter, help you verify continuity and voltage levels for safety and reliability.
Using the color coding simplifies the wiring process. It helps you connect the wires correctly without confusion, saving you time and effort.
Having everything organized and ready makes the wiring process smoother. It reduces mistakes and makes installation safer and more efficient.
Once you’ve gathered and arranged your tools and materials, you’re all set to confidently move on to the wiring steps.
Understand How Fuel Gauges Work and Key Components
Understanding how fuel gauges work starts with knowing their main parts and how they work together. The key components are the fuel sending unit, the gauge, and the wiring.
The fuel sending unit, which is installed in your fuel tank, measures how much fuel is left and sends an electrical signal based on the float’s position. The gauge then receives this signal and shows the fuel level.
Getting a good grip on your vehicle’s fuel system helps you see how these parts connect and communicate. When working with electrical parts, always prioritize safety—disconnect the battery before wiring and use insulated tools.
Understanding your fuel system ensures safe, accurate connections—always disconnect the battery and use insulated tools.
Knowing that the gauge operates on a simple electrical circuit helps prevent damage and keeps your readings accurate. By understanding these parts and what they do, you build a solid base for wiring your fuel gauge correctly.
This reduces errors and keeps everything running safely and reliably.
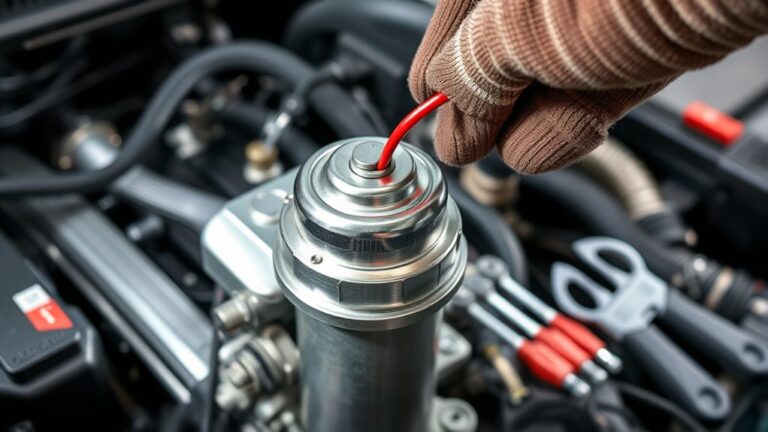
Locate and Identify the Fuel Sending Unit and Power Source
First, find the fuel sending unit. It’s usually located inside the fuel tank or behind an access panel. Once you’ve found it, take a look at the wires connected to it. These wires are important because they send the fuel level information to your gauge.
Next, you’ll want to check the power source. Typically, this is the vehicle’s 12V supply. Make sure you identify the correct wiring for the power, so you know everything’s wired properly.
Getting these components right from the start will give you a solid foundation for wiring your fuel gauge correctly.
Find Fuel Sending Unit
Your vehicle’s fuel sending unit is usually located inside the fuel tank, often near the top or on the side. To find it, you’ll need to access the tank—either by removing a panel or dropping the tank itself.
Refer to your vehicle’s wiring diagram to help identify the sending unit’s electrical connections and fuel line connections. Once you’ve found it, look for a small float attached to a metal arm that moves with the fuel level.
The sending unit’s wiring is often color-coded, which makes it easier to connect later. Confirm its location before proceeding, as knowing exactly where it is will make wiring and replacement much simpler.
Proper identification is key to ensuring an accurate fuel gauge reading.
Verify Power Source
Once you’ve located the fuel sending unit inside the tank, the next step is to verify the power source. Make sure your circuit has proper voltage regulation to prevent surges that could damage components. Use a multimeter to check the power line for consistent voltage.
Also, check that circuit protection devices like fuses or circuit breakers are intact and working properly. Confirming these elements keeps your wiring safe and reliable.
Ensure the power source is a battery or 12V supply, and that proper voltage is being applied. Look for no signs of damage or corrosion.
Finally, verify that the power flow is consistent and protection devices are correctly rated. Doing these checks will help your fuel gauge operate correctly and prevent voltage spikes.
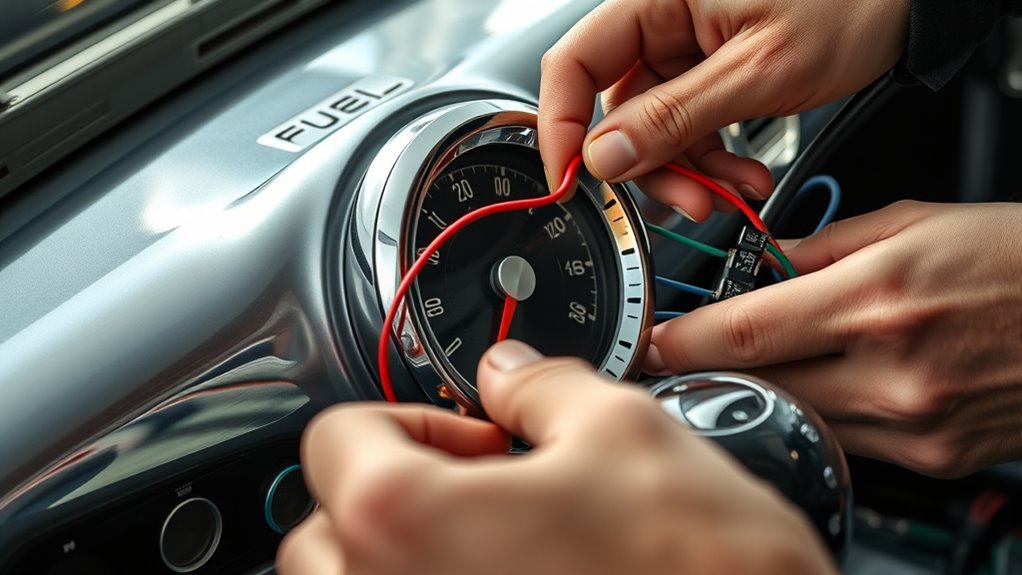
Connect the Fuel Sending Unit to Your Gauge
Connecting the fuel sending unit to your gauge is a key step to get accurate fuel level readings.
First, find where the fuel tank is and locate the sending unit’s wiring terminals. The wire from the sending unit should connect securely to the gauge’s signal terminal, usually marked as “Sender” or “S.”
Make sure the wiring is clean and free from corrosion to avoid false readings. Keep the wire’s length short to reduce voltage drops that could affect calibration.
Ensure the ground wire from the sending unit is properly connected to the vehicle’s chassis for a good ground connection.
Once connected, double-check that the wiring is tight and insulated to prevent shorts.
When wired correctly, the sending unit converts the tank level into an electrical signal, which your gauge interprets.
This ensures your readings are reliable and helps you avoid running out of fuel unexpectedly.
Wire the Power and Ground Connections Properly
Proper wiring of the power and ground connections is crucial for your fuel gauge to work accurately. A secure setup helps ensure reliable readings and keeps your battery safe.
Secure wiring ensures accurate fuel gauge readings and keeps your battery safe.
Start by checking your wiring diagram to identify the correct connections. Then, follow these key steps: Connect the power wire to the vehicle’s ignition switch or directly to the positive terminal of the battery, making sure it’s protected with a fuse.
Attach the ground wire securely to a clean, bare metal surface on the vehicle’s chassis to prevent voltage drops. Double-check that all connections are tight and properly insulated to avoid shorts or disconnections.
Use high-quality wires rated for automotive use to enhance safety and durability. This simple approach ensures your fuel gauge stays reliable and your vehicle stays safe.
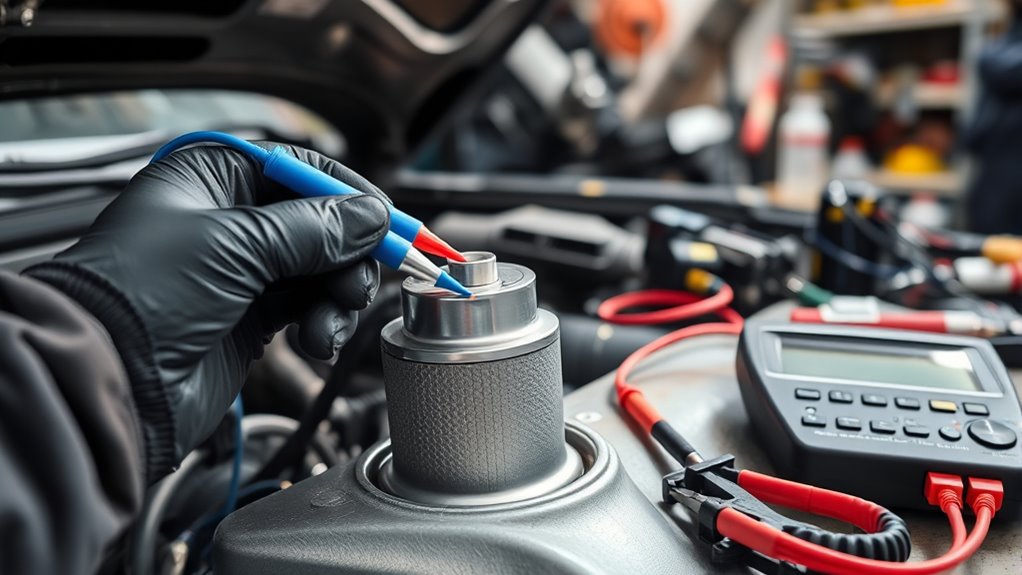
Test Your Fuel Gauge Wiring to Ensure Accurate Readings
To make sure your fuel gauge is working properly, start by checking that the power supply is stable and connected the right way. It’s always good to double-check that the wires are snug and making good contact. Then, take a look at your ground connections—look for any loose or corroded spots that might cause false readings. Lastly, test the gauge with a known fuel level, like filling your tank to a specific amount, so you can see if the readings match up. This way, you’ll know everything’s functioning correctly.
Verify Power Supply Properly
Have you confirmed that your fuel gauge is receiving the correct power supply? To ensure accurate readings, you should verify your voltage regulation and circuit protection.
Here’s how you can do that:
Use a multimeter to check the voltage at the power source. Look for a steady voltage that matches your gauge’s specifications.
Make sure the circuit is protected with the right fuses or circuit breakers. This helps prevent voltage spikes that could cause issues.
Inspect your wiring for loose connections or corrosion, as these can disrupt proper voltage regulation.
Finally, ensure the power supply is consistent and not fluctuating. Unstable voltage can lead to inaccurate gauge readings.
Check Ground Connections
Since a good ground connection is essential for your fuel gauge to work accurately, you should test it to make sure it’s secure and free of corrosion.
Start by checking the grounding point for solid electrical grounding. Use a multimeter to test ground continuity between the gauge’s ground wire and the vehicle’s chassis.
A proper connection will show a low resistance reading, confirming good electrical grounding. If there’s no continuity or the reading is high, clean the connection point and make sure the wire is securely attached.
Poor ground connections can cause inaccurate readings or gauge malfunctions. Ensure all grounding terminals are tight, rust-free, and properly secured for reliable electrical grounding, which is vital for correct fuel level indication.
Test Gauge Accuracy
A simple way to verify your fuel gauge wiring is by testing its accuracy using a multimeter or a known good ground. This step helps ensure your fuel gauge is installed correctly and that your wiring is safe.
To check the readings, start by turning on your vehicle and watching the fuel gauge. Then, use a multimeter to measure the voltage at the sender unit or ground wire.
Next, adjust the fuel level by adding or draining fuel. Watch to see if the needle responds correctly to these changes. It should move smoothly and accurately.
Finally, compare the gauge reading to the actual fuel level. If they don’t match or if the readings seem inconsistent, double-check your wiring connections and contacts.
Confirming the accuracy here helps prevent false fuel readings and keeps your vehicle safe to operate. Proper testing ensures your fuel gauge wiring is both reliable and safe.
Troubleshoot Common Fuel Gauge Wiring Problems
Troubleshooting common fuel gauge wiring issues usually starts with checking for broken or loose connections. These can cause inaccurate readings or even make the gauge stop working altogether.
Knowing how the fuel gauge was wired initially helps you understand its function. This makes diagnosing problems a lot easier.
Begin by reviewing the wiring diagram carefully. Make sure all wires are connected correctly and that terminals are clean and tight.
Loose or corroded connections can interrupt the electrical flow, leading to false readings.
If the gauge needle sticks or jumps around, test the wiring with a multimeter. Look for damaged insulation or broken wires along the circuit.
Common issues also include poor grounding or incorrect power supply connections.
By systematically checking these components, you can find the source of the problem caused by wiring errors or wear.
Understanding the wiring diagram and the fuel gauge’s history makes troubleshooting more straightforward.
Ultimately, this helps you restore accurate fuel level readings quickly and efficiently.
Frequently Asked Questions
Can I Wire a Fuel Gauge Without Professional Help?
Yes, you can wire a fuel gauge without professional help if you’re comfortable with basic DIY installation and wiring tips. Just make sure to carefully follow the instructions, identify the correct terminals, and use the right tools.
Always disconnect the battery before you start, double-check your connections, and test the gauge before you finish. Taking your time and sticking to safety precautions makes the job easier and helps ensure a successful installation without needing a pro.
What Safety Precautions Should I Take During Wiring?
You should prioritize electrical safety and make certain of proper wiring when working with your fuel gauge. Always disconnect the battery before starting to prevent shocks or short circuits.
Use insulated tools, wear rubber gloves, and keep your workspace dry. Follow the wiring diagram carefully, double-check all connections, and avoid overloading circuits.
Taking these safety steps helps prevent accidents, ensures your wiring is secure, and keeps your vehicle working correctly.
How Do I Choose the Right Gauge Wires?
To choose the right gauge wires, consider gauge compatibility and wire insulation. Pick a wire gauge that can handle your fuel gauge’s current load—usually between 18 and 22 gauge.
Make sure the wire insulation is rated for your vehicle’s environment and resistant to fuel and heat. This helps protect your wiring and ensures your fuel gauge system works safely and reliably.
What Is the Typical Cost of Installing a Fuel Gauge?
You’ve got the dashboard ready, but how much will it cost to see that fuel reading? Installation costs vary, usually between $50 and $150, depending on your vehicle and how complex the setup is.
If you choose to hire a professional, expect to pay more—around $100 to $300. This ensures proper wiring and reliable performance.
That small investment gives you peace of mind on the road, knowing your fuel gauge works perfectly.
How Often Should I Calibrate My Fuel Gauge?
You should calibrate your fuel gauge at least once a year to keep the readings accurate. Regular calibration helps ensure the gauge shows the correct fuel level over time.
If you notice your fuel readings are inconsistent or off, it’s a good idea to calibrate more often. This way, you avoid surprises when the fuel runs low.
If you often drive in extreme conditions or have made modifications to your vehicle, consider checking your calibration more regularly. Staying on top of it keeps your gauge reliable.
Proper calibration helps prevent unexpected fuel shortages and can save you money. It’s a simple step for better fuel management and peace of mind.
Conclusion
By following these steps carefully, you can confidently wire your fuel gauge and ensure it provides accurate readings. Proper wiring is the backbone of reliable gauges, so taking your time is essential.
Incorrect connections can lead to faulty displays, which you definitely want to avoid. Double-check everything, test thoroughly, and don’t rush through the process.
With patience and attention to detail, you’ll have a dependable fuel gauge. This not only prevents surprises on the road but also saves you time and effort in the long run. Proper wiring makes all the difference.