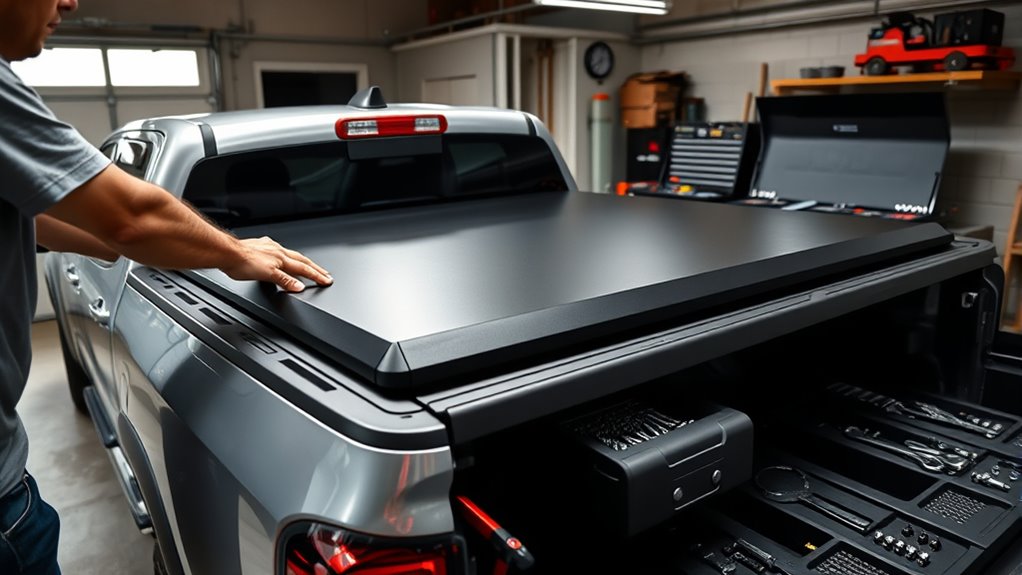
How to Install a Tonneau Cover With a Toolbox in Seven Steps
Installing a tonneau cover with a toolbox might seem like a daunting task, especially if you’re worried about the complexity or not having the right tools. You’re not alone—many people struggle with getting everything to fit just right and ensuring it’s secure enough for daily use.
To install a tonneau cover with a toolbox in seven steps, start by gathering your tools and preparing a clean workspace. Measure carefully to mark proper placement for the rails and the toolbox, making sure everything lines up perfectly.
Secure the rails and mounting points firmly, then attach the cover and toolbox. Take your time to check that everything fits well and feels secure. Remember, a proper fit is key to preventing issues down the road.
Always test the system before driving around to make sure everything stays in place and works smoothly. Finish with a final inspection to ensure all bolts and screws are tight and nothing is loose.
Keep going for detailed guidance on each step, so your installation is both professional and secure. With patience and a bit of effort, you’ll be enjoying your new setup in no time.
Key Takeaways
- Measure and mark the bed to make sure the rails, cover, and toolbox go in the right spots.
- Prepare your workspace by cleaning out the truck bed and gathering all your tools and materials.
- Attach the rail brackets securely, making sure they’re level, aligned, and spaced properly.
- Position the toolbox where you want it, tighten it up, then install the cover, checking that everything fits well and moves smoothly.
- Do a final walk-around to tighten all fasteners, and test the cover’s security and how it opens and closes.
Why Choose a Tonneau Cover With a Built-In Toolbox?
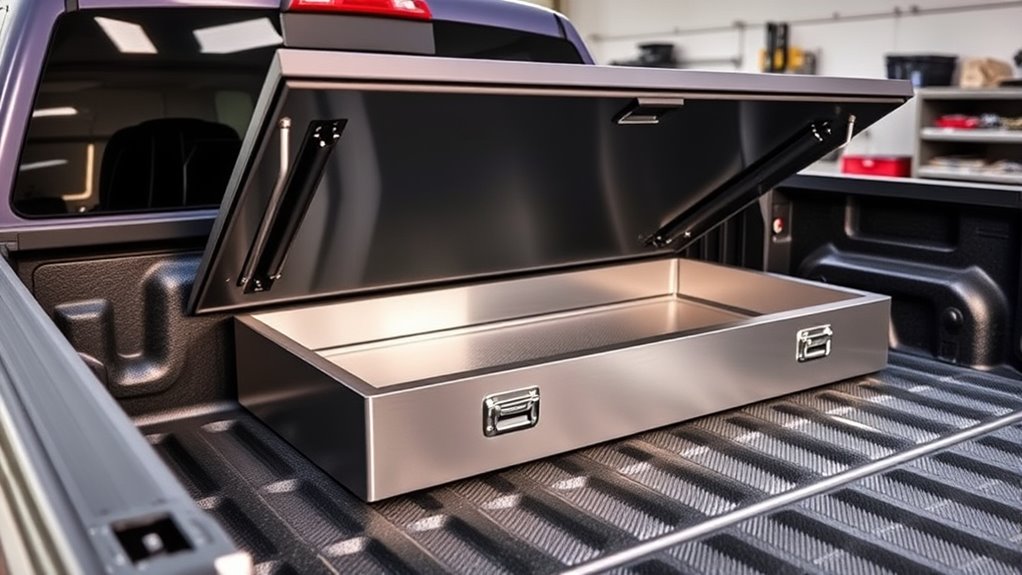
A built-in toolbox on a tonneau cover offers a convenient and secure way to store your tools and supplies. One key advantage is its durability; these toolboxes are made from tough materials that withstand harsh weather, reducing the risk of damage.
Their sturdy construction ensures your tools stay safe during transport and can handle heavy or sharp items without cracking or warping. Furthermore, a built-in toolbox boosts your vehicle’s aesthetic appeal. It provides a seamless, integrated look that’s cleaner and more streamlined than aftermarket storage options.
This sleek design adds a touch of sophistication, making your truck look well-organized and professional. Choosing a tonneau cover with a built-in toolbox means combining practicality and style. It keeps your gear secure, protected from the elements, and always within reach.
Gather Your Tools and Materials for Installation
Gather all necessary tools and materials beforehand for a smooth, efficient installation process.
Before you start installing the tonneau cover with a toolbox, make sure you have all the necessary tools and materials. This helps keep things running smoothly and avoids surprises. Proper material selection is key, so pick parts that work with your truck model.
Double-check that you have the right tools on hand to prevent delays and frustration during installation. Here’s what you’ll need: a screwdriver and socket set, drill with drill bits, measuring tape and marker, and rubber gaskets or sealant for weatherproofing.
Safety is important. Wear gloves to protect your hands and eye protection when drilling. Before you begin, ensure all components are present. Gathering everything beforehand keeps you focused and makes the process quicker.
With your tools and materials ready, you’ll be prepared to move confidently to the next step. This approach streamlines your installation and helps ensure everything fits securely.
Prepare Your Truck Bed and Clear the Workspace
Before you start installing your tonneau cover, take a few minutes to clear out any debris or loose items from your truck bed. It’s usually quicker and easier to work in a clean space, and it helps make sure everything goes smoothly.
Also, organize your workspace so you can grab your tools and materials easily. Having everything within reach means you won’t have to search around or deal with a cluttered area—that way, you can focus on the job without any unnecessary delays. Keeping things tidy not only makes the process more efficient but also helps protect your truck and that new cover from any accidental damage.
Clear Bed of Debris
Have you checked your truck bed for debris lately? It’s important to remove any dirt, leaves, or loose debris before installing a tonneau cover with a toolbox. A clean, flat surface makes sure the cover fits properly and helps prevent damage later on.
Before you get started, take a moment to:
- Remove any tools or accessories inside the bed
- Clear away mud or grime
- Sweep off leaves, twigs, and dust
- Wipe down the bed surface for cleanliness
A clutter-free, debris-free truck bed makes installation safer and more accurate. Plus, it’s easier to spot any damage or rust that might need fixing before you proceed.
Organize Workspace Efficiently
Why is it important to organize your workspace before installing a tonneau cover? Proper workspace organization makes sure you have enough room to work safely and efficiently.
By clearing and arranging your truck bed, you prevent clutter that could hinder installation. Focus on storage optimization by removing unnecessary items and grouping tools nearby.
This makes it easier to access components and follow the installation steps without interruption. An organized workspace reduces the risk of losing parts or damaging your truck.
It also helps you stay focused and avoids frustration. Take a few minutes to tidy up, ensuring your truck bed is clean and everything you need is within reach.
Effective workspace organization simplifies the process, making installation quicker and more straightforward.
Measure and Mark for Proper Cover and Toolbox Placement
To ensure your tonneau cover and toolbox fit properly, you need to carefully measure and mark where they’ll go on your truck bed. Focus on choosing the right materials and being precise with your measurements to make sure everything lines up.
Use a tape measure for accurate dimensions and double-check your measurements before marking. Think about the size of your toolbox and the cover’s clearance to avoid any interference.
Use a tape measure and double-check measurements to ensure proper fit and clearance for your toolbox and cover.
Select simple tools like a pencil or masking tape for marking spots on the bed. Remember, measure twice, mark once—this helps prevent mistakes.
Align your marks with existing features on your truck bed to keep everything consistent. Also, account for material thickness and clearance to ensure a perfect fit.
Taking the time to measure and mark carefully now will save you headaches later. It helps make your setup secure and functional, setting a good foundation before you move on to installation.
Install the Tonneau Cover Rails and Secure Mounting Points
First, you’ll want to mark where you’re going to install the tonneau cover rails and mounting points based on your measurements. Take your time to get these spots just right—that way, everything lines up perfectly later on.
Once you’ve marked everything, go ahead and securely attach the rail brackets to those locations. Make sure they’re tightened properly so they don’t come loose. After that, give everything a good check to confirm it’s all aligned correctly. That way, you’ll get a smooth, secure fit when you’re done!
Mark Installation Locations
Have you identified the proper locations for your tonneau cover rails and mounting points? Marking these spots is key to achieving the best truck bed customization and tonneau cover styling.
Start by measuring from the truck cab to ensure even placement on both sides. Use a pencil or painter’s tape to mark where the rails will sit, avoiding any toolbox interference.
Make sure the marks are level for a clean, professional look. Check that the mounting points won’t interfere with bed accessories or the tailgate.
Verify the measurements twice before drilling. Remember, precise placement ensures easy installation and a sleek finish.
Taking your time now prevents adjustments later, streamlining the process. Proper marking guarantees your tonneau cover fits perfectly and looks great.
Attach Rail Brackets Securely
Once you’ve marked the precise locations for your rails, it’s time to attach the brackets securely. Start by aligning the brackets with your marked spots, making sure they fit well around your toolbox for locking.
Tighten the bolts or screws, but don’t over-tighten, so you can still make adjustments if needed later. Proper rail adjustment is key—make sure the rails are straight and level with respect to the truck bed.
Securing the mounting points firmly prevents shifting during driving, which can affect both the toolbox and tonneau cover. Check that each bracket is securely fastened before moving on.
Proper attachment at this stage ensures a stable foundation for your tonneau cover, avoiding any movement or misalignment down the road.
Ensure Proper Alignment
To guarantee your tonneau cover functions properly and looks professional, it’s essential to confirm that the rails are aligned correctly before fully securing them. Proper alignment ensures material durability and a snug fit, preventing leaks or movement.
Use simple alignment techniques like measuring distances from the truck bed edges or checking if the rails are level to verify their positioning. This helps ensure everything lines up properly and looks neat.
Double-check that the rails are straight and evenly spaced along the bed. Carefully aligning the mounting points helps maintain a clean appearance and can extend the cover’s lifespan.
Keep in mind, adjusting the rails as needed before tightening completely is key to a secure fit and a professional look.
Attach the Toolbox to Your Cover and Align It Correctly
Are you unsure how to securely attach the toolbox to your tonneau cover? Focus on proper toolbox integration to guarantee a stable setup.
First, position the toolbox so it lines up with the markings on your cover. Use a level to check that it sits straight and evenly.
Most toolbox brackets or clamps have adjustment points, so tighten them gradually. After each turn, double-check the alignment to ensure it stays correct.
If needed, make small tweaks to the position to get rid of any gaps or tilts. Proper attachment ensures the toolbox won’t shift while you’re driving.
Remember, securing the toolbox isn’t just about fastening it down. It’s about placing it precisely for the best fit.
Take your time to get everything lined up correctly. Double-check all bolts and clamps before moving on to the next step.
Proper alignment now makes the rest of the installation easier and helps achieve a professional look.
Secure the Cover and Toolbox to Your Truck Bed
To keep your cover and toolbox secure, you want to make sure they’re properly aligned and fit snugly. It’s best to use the right fasteners and tighten them up really well so nothing wiggles or moves around.
Once everything’s in place, take a moment to double-check that it all looks stable and feels secure. Only then should you hit the road—better safe than sorry!
Ensuring Proper Alignment
Before securing the cover and toolbox, make sure everything lines up correctly. Proper alignment guarantees safe installation and helps avoid future issues. Use tools like a Tape measure or level to check that the tonneau cover sits evenly and the toolbox fits securely without shifting.
Double-check that the cover’s rails are straight and parallel to the truck bed sides. Verify the toolbox is flush and evenly aligned with the cover. Make sure the mounting brackets are in the right spot and tightly secured.
Finally, confirm that the cover opens and closes smoothly without any obstructions. Taking these steps ensures your components are properly aligned, making installation safer and more durable.
Getting everything aligned before tightening fasteners or finishing up makes all the difference. It’s the key to a solid, long-lasting setup.
Using Secure Fasteners
Securing the cover and toolbox firmly to your truck bed is key to preventing shifting and ensuring durability. Use the right fasteners like bolts, screws, or rivets to attach them securely.
Choose fasteners that match your truck’s material and can handle outdoor conditions. Tighten them properly, but don’t over-tighten as that can cause damage.
Spread the fasteners evenly along the edges of the cover and around the toolbox to keep everything stable. Double-check that each one is tight and secure.
This careful selection and installation of fasteners help keep your tonneau cover and toolbox mounted reliably. It ensures they stay in place during transport and last longer.
Verifying Stability
Once you’ve installed the fasteners, it’s important to check that the cover and toolbox are stable and securely attached.
Look for any wobbling or looseness that might affect vehicle stability, especially when you’re driving.
Make sure the tonneau cover is flush with the truck bed and all points are tightly fastened.
Check that the toolbox is securely in place and not shifting around.
If you’re thinking about using a roof rack, verify that the added weight doesn’t impact the stability of your setup.
Focus on key points:
- Ensure all fasteners are tight and properly seated
- Test the tightness of the toolbox clips and brackets
- Confirm the cover lies flat without gaps or movement
- Double-check the integration with any roof rack attachments
A secure setup prevents shifting, helping maintain vehicle stability on the road.
Test Coverage, Toolbox Access, and Safety Features
Ensuring your tonneau cover with a toolbox works well and safely means doing thorough testing, easy access, and including the right safety features.
Test the cover in different conditions to make sure it’s secure during winter storage. Check that ice or snow don’t cause damage or block access.
Test in various conditions to ensure winter security without ice or snow damage or access issues.
Make sure the toolbox locks are reliable so your gear stays safe and easy to reach when you need it.
Verify that safety features like weather seals and locks prevent accidental openings and keep water and debris out.
Good vehicle insulation is also key if you’re storing valuables in the toolbox during cold months.
A quality cover should allow smooth access without sacrificing security or insulation.
Perform Final Inspection and Get Maintenance Tips
Before finalizing your installation, it’s important to do a thorough inspection to catch any overlooked issues. Make sure all bolts, screws, and clamps are securely tightened. Check that the tonneau cover sits flush and moves smoothly without resistance.
Next, verify that the toolbox doors open and close properly, and ensure the seals are tight to prevent water from getting in. Also, test the locking mechanisms to make sure they’re working correctly.
For ongoing maintenance, keep your cover and toolbox clean with simple DIY methods. Regularly wipe down surfaces with a damp cloth to remove dirt and debris.
Use gentle cleaning solutions to avoid damaging finishes. It’s also a good idea to lubricate the locking mechanisms and hinges from time to time.
Inspect the seals and gaskets, replacing any that are cracked or worn. Following these tips and routine checks will help your tonneau cover with toolbox stay in great shape and last longer.
Troubleshoot Common Installation Issues and When to Seek Help
Even with careful installation, you might run into common issues that can affect how well your tonneau cover works with a toolbox. This includes problems like leaks, loose bolts, or panels that aren’t aligned properly.
If the cover doesn’t latch properly, double-check all hinges and locking mechanisms to make sure they’re secure. Issues with fitting the toolbox correctly may mean re-measuring or adjusting the brackets.
Keep an eye out for uneven gaps or if it’s hard to open—these can be caused by debris or obstructions. If problems keep happening, it’s a good idea to consult the manufacturer’s guide, online tutorials, or customer support for help.
These resources usually have detailed solutions for common issues. Don’t hesitate to reach out if troubleshooting on your own doesn’t fix things.
Handling installation issues early helps your tonneau cover work properly and last longer. When you’re unsure, getting help saves time and prevents damage that might lead to costly repairs.
Frequently Asked Questions
Can I Install a Tonneau Cover Without Professional Assistance?
Yes, you can install a tonneau cover without professional help if you follow the instructions carefully.
Make sure your truck has a compatible trailer hitch and consider adding a bedliner protection if needed.
Gather the necessary tools, read the manufacturer’s guide, and take your time to guarantee a secure fit.
With patience and attention, you can efficiently complete the installation yourself, saving money and customizing your truck’s look.
What Is the Weight Limit for a Built-In Toolbox?
The weight limit for a built-in toolbox usually falls between 200 and 500 pounds, depending on the manufacturer and model.
Always check your toolbox’s specs to ensure it can handle your tools and other items safely.
Keep in mind, exceeding the weight limit can weaken the cover’s durability and security.
That’s why it’s important to load it within the recommended limits to keep the cover working well and your tools protected.
Are Compatible Tonneau Covers Available for All Truck Models?
Like a key fitting perfectly into a lock, compatible tonneau covers are available for most truck models. When choosing truck accessories, you’ll find options tailored to different makes and sizes.
For smooth installation, follow expert tips to ensure the cover fits securely over your toolbox. Remember, not all covers fit every truck, so double-check specifications before buying.
This way, you’ll get a seamless, secure fit that improves your truck’s look and functionality.
How Do I Maintain the Toolbox and Cover After Installation?
After installation, it’s a good idea to regularly clean your toolbox with mild soap and water. This helps prevent dirt from building up and keeps your tools in good shape.
For the cover, make sure you apply a waterproofing spray every now and then to keep it water-resistant. It’s also important to check for leaks or damage after heavy rain.
If you notice any loose bolts or seals, tighten them up to prevent further issues. Taking care of your toolbox and cover like this helps them last longer and keeps your tools protected from the elements.
Will Installing a Tonneau Cover Affect My Truck’s Aerodynamics?
Think of your truck like a sailboat. Adding a tonneau cover with a toolbox can make its shape more streamlined, which can improve both looks and fuel efficiency.
You’ll notice less wind resistance and better mileage, especially at highway speeds. Some small aerodynamic changes happen, but they’re usually worth it for the sleek look and savings on fuel.
Conclusion
Now that you’ve installed your tonneau cover with a toolbox, it’s clear that it’s more than just a practical upgrade. It’s like the universe conspired to help you keep your truck perfectly organized.
From measuring carefully to securing every detail, you’ve created a seamless blend of utility and style. It’s a smart way to maximize your truck bed’s potential.
Keep an eye on regular maintenance and enjoy the unexpected convenience of a well-equipped, reliable truck bed. Who knew that installing a tonneau cover with a toolbox could make your daily drive so much easier?