
How Long Does It Take to Replace Shocks in 7 Steps
Many car owners find replacing shocks to be a frustrating and time-consuming task, especially if you’re new to auto repairs. You’re not alone—this job can feel overwhelming and complicated. But with the right knowledge and some helpful tips, you can get it done more efficiently.
Replacing shocks typically takes about 1 to 2 hours per corner if you’re experienced and have the right tools. The process involves several steps, from preparing your vehicle to removing the old shocks and installing new ones.
Factors like vehicle type, rust, or limited space can extend the time, so it’s good to be prepared. To get the best results, proper preparation and safety measures are essential.
Continue exploring to find tips that can help you save time and make the job easier.
Key Takeaways
- Replacing shocks usually takes around 1 to 2 hours per corner. The exact time depends on your experience and the vehicle type.
- Removing each shock generally takes about 30 minutes. But this can change based on how accessible the shocks are and how complicated the job is.
- Having the right tools and being well-prepared can really cut down the overall time it takes.
- If the components are rusted or damaged, it might take longer to remove and install the shocks.
- Skilled technicians tend to do the replacements faster thanks to their experience and troubleshooting skills.
How Long Does Replacing Your Vehicle’s Shock Usually Take?

Replacing your vehicle’s shocks usually takes about 1 to 2 hours per corner, but the total time can vary depending on your experience and tools. If you’re familiar with car maintenance, you’ll likely get it done faster, while beginners might need more time.
Proper shock alignment is crucial after replacement to ensure your suspension works correctly. Misalignment can cause uneven tire wear and make your ride less comfortable.
If you’re just starting out, expect some delays—especially if you run into stuck bolts or rusted components. Having the right tools ready will make the process easier and help avoid frustration.
Some vehicles are straightforward to work on, while others need extra steps or special accessories. Remember, besides removing and installing shocks, taking the time for proper shock alignment afterward is key to maintaining a smooth ride and vehicle stability.
Though the job can be quick, following proper procedures is important for safety and long-term performance.
Preparing Your Vehicle and Tools for Shock Replacement
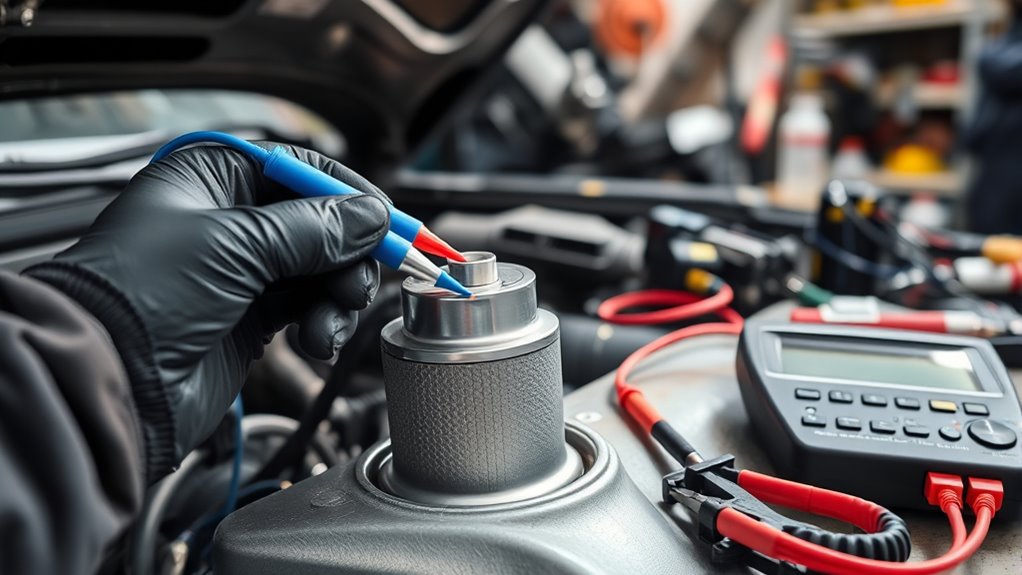
Before you dive into replacing your shock absorbers, make sure you’ve got all the tools you’ll need. It’s also a good idea to secure your vehicle properly—engage the parking brake and use wheel chocks to prevent any rolling. Oh, and don’t forget to give the shock components a quick once-over. Look for any signs of damage or excessive wear; you want to be sure everything’s in decent shape before you start the job.
Gather Necessary Tools
To successfully replace your vehicle’s shocks, you need to gather the right tools and prepare your workspace. Start with a set of socket wrenches and a ratchet to remove mounting brackets securely. You’ll also need a jack and jack stands to raise the vehicle safely. Keep some rubber mallets handy for loosening stubborn parts.
Have replacement shocks ready, along with shock fluid if your new shocks require it. A torque wrench ensures bolts are tightened correctly. Don’t forget safety equipment like gloves and eye protection.
Carefully inspect your mounting brackets for rust or damage. Replacing damaged brackets improves stability. Gathering these tools and supplies beforehand streamlines the process and minimizes surprises, making the shock replacement easier and more efficient.
Ensure Vehicle Safety Measures
Ensuring your vehicle is securely prepared before starting the shock replacement process is essential for safety. Begin by parking the car on a flat surface, engaging the parking brake, and blocking the wheels to prevent movement.
Wear safety glasses and gloves to protect against debris and harsh fluids. Proper suspension tuning and shock calibration are critical for maximum performance after the replacement.
Make sure to loosen or tighten components with the vehicle off and on a stable jack, avoiding sudden shifts. Double-check that the jack stands are secure before crawling underneath.
If necessary, disconnect the battery for added safety. These measures help prevent accidents and guarantee you work in a safe environment while maintaining proper shock function.
Inspect Shock Components
Once you’ve parked your vehicle securely and gathered your tools, it’s important to thoroughly inspect the shock components. Start by examining the shock material—whether it’s rubber, polyurethane, or metal—and check for signs of wear, cracking, or leaking.
Next, assess the mounting style, as different shocks use different mounts, like eyelets or flange types. Look for any rust, corrosion, or damage to mounting brackets that could affect removal or installation.
Check for loose bolts or missing hardware, which could make the replacement process more difficult. By carefully inspecting these shock components, you’ll identify potential issues and make sure you have the right replacement parts.
This step helps prevent surprises during installation and confirms your vehicle is ready for shock replacement.
Removing Old Shocks: Step-by-Step and Approximate Time
Removing the old shocks is straightforward but requires careful attention to safety and the right tools. Make sure the vehicle is securely lifted and supported before you start.
Begin by removing the wheels so you can access the shocks. Use a socket wrench to loosen and remove the bolts holding the shocks to the suspension.
While you’re removing them, perform shock diagnostics to check for signs of wear or damage, which can affect ride quality. If the shocks are stuck or corroded, applying penetrating oil can help loosen them.
Be cautious of compressed components to avoid injury. Removing each shock usually takes about 30 minutes, depending on your experience and the vehicle’s condition.
When you take out the shocks, inspect them for leaks or dents. These issues can impact how well the shocks work and overall ride comfort.
Once removed, store the old shocks safely, keeping all hardware organized for reinstallation. This step is essential to complete the replacement process safely and accurately.
Installing New Shocks: What to Expect and Time Estimates
Installing new shocks involves aligning them with the mounting points, securing the bolts, and tightening them to the manufacturer’s specifications. As you replace the shock absorber, you’ll notice how each component fits precisely to guarantee excellent suspension performance.
This process is essential for a proper suspension upgrade, which improves ride comfort and handling. Expect to position the shock carefully, making sure it lines up correctly before tightening.
You’ll use a wrench or socket to secure the bolts firmly, adhering to torque specs to prevent issues later. The time it takes can vary depending on your experience and vehicle type, but generally, installing each shock can take about 30 minutes to an hour.
Once installed correctly, the shock absorber will help restore your suspension’s effectiveness. Keep in mind, this step is critical for ensuring your suspension upgrade delivers maximum safety and riding smoothness.
Factors That Affect How Long Shock Replacement Will Take
So, how long it takes to replace shocks really depends on your vehicle’s make and model. Some cars make the job straightforward with easy-to-access parts, while others might be a bit more challenging to work on because of limited space or tricky components.
Also, the experience of your technician can make a big difference. A seasoned pro who’s done this many times usually woos through the job quicker and more efficiently than someone newer to the task.
Keeping these factors in mind can help you get a better idea of how long your shock replacement might actually take.
Vehicle Make and Model
Your vehicle’s make and model play a big role in how long shock replacement takes. Different cars have unique suspension setups that affect how accessible and complicated the job is.
Some models make shocks easier to reach, which speeds up the repair. Others might require removing parts first, making the process longer.
The shock’s lifespan also depends on the vehicle’s design and how you use it. Worn or corroded parts can add to the replacement time.
Heavy-duty trucks usually have tougher suspension systems, so replacing shocks can take longer because of their size and weight.
Knowing your vehicle’s make and model helps you set realistic expectations for how long the repair will take. It prepares you for a quicker fix or a more involved job.
Technician Experience Level
When a skilled technician works on replacing shocks, the job often goes faster because of their experience. Their familiarity with shock absorber design helps them spot problems quickly and figure out the best approach.
An experienced technician also knows the right tools for the job, which speeds up removal and installation. They handle different suspension setups efficiently, reducing the chances of mistakes or delays.
Plus, they’re good at troubleshooting common issues that come up during shock replacement, saving you time. Compared to a novice, an expert can finish the job faster, making it smoother and more efficient.
Their expertise really makes a difference in how long the replacement takes and helps prevent unnecessary complications.
Should You DIY or Hire a Professional? Pros, Cons, and Time Comparison
Deciding whether to tackle shock replacement yourself or hire a professional depends on your skills, tools, and the time you have available. DIY safety is crucial; if you’re comfortable working under your vehicle and have some experience, doing it yourself can save money and feel pretty rewarding.
But keep in mind, mistakes can lead to safety issues or damage that might cost you more later on. Hiring a pro means paying for their labor, but they have the expertise and tools to get it done right and quickly.
Costs vary, but pros often include warranties and guarantees with their work. If you’re short on time or unsure about your skills, it’s usually smarter to hire a mechanic.
On the other hand, if you’re confident, prepared, and prioritize safety, going the DIY route can be more affordable and satisfying—just be sure you understand the time involved and stay safe along the way.
Tips to Speed Up Your Shock Replacement Process
To speed up your shock replacement process, proper preparation is key. Before you start, gather the right tools, new shocks, and check for any rust or corrosion that could slow you down.
Keeping your work area organized minimizes delays, helping you complete the task efficiently. Remember, quick replacements don’t mean skipping safety; road safety considerations remain vital to guarantee your vehicle’s handling and shock absorber longevity.
Here’s a handy chart to keep in mind:
| Tip | Why It Helps | Result |
|---|---|---|
| Use the right tools | Reduces time troubleshooting equipment issues | Faster, smoother process |
| Apply penetrating oil | Loosens rusted components | Less effort, less damage |
| Keep spare parts handy | Prevents delays from missing items | Continuous workflow |
| Maintain a clean work area | Avoids losing small parts | Quicker reassembly |
| Follow manufacturer instructions | Ensures correct procedures, avoids mistakes | Safe, long-lasting shocks |
Implementing these tips improves shock absorber longevity and boosts road safety.
Frequently Asked Questions
Are There Signs Indicating Shocks Need Replacement Before the Scheduled Timing?
Yes, there are signs indicating shocks need replacement before the scheduled timing. During shock inspection, you might notice increased bouncing, poor steering response, or uneven tire wear. These are all signs it’s time to replace them.
When replacing shocks, make sure to use the right tools and replacement parts for your vehicle. Addressing these signs early helps ensure a smoother ride and better handling.
It also helps prolong the life of your suspension system, saving you money in the long run. So keep an eye out for these signs and don’t wait too long to replace your shocks.
How Do Different Vehicle Types Impact Shock Replacement Duration?
Different vehicle types significantly affect how long shock replacements take because of suspension durability and compatibility.
For example, trucks and SUVs usually have heavier, more complex suspensions, which can take longer to replace shocks.
Sports cars tend to have simpler setups, so their shock replacements are generally quicker.
Always keep your specific vehicle’s design and suspension system in mind to get a more accurate estimate.
Tough suspension setups or incompatible shocks may also extend the replacement process.
What Are Common Mistakes That Can Delay Shock Replacement?
Did you know that improper shock replacement can lead to increased suspension wear and costly repairs? It’s a problem that often happens when people rush the job or skip safety steps.
You might delay the process if you ignore safety precautions or try to rush through the repairs. Taking your time really makes a difference here.
Incorrectly diagnosing the issue, using low-quality parts, or skipping essential tools can also slow things down and drive up costs.
To avoid these common mistakes, follow the proper procedures carefully. Double-check your work and ensure you’re using the right parts for your vehicle.
Is There a Recommended Frequency for Replacing Shocks?
You should replace your shocks every 50,000 to 60,000 miles for the best maintenance. Regular suspension inspections help catch wear early, so your vehicle handles safely and smoothly.
If you notice excessive bouncing, uneven tire wear, or strange noises, it’s a good idea to get your shocks checked sooner. Staying on top of these replacement intervals and inspections keeps your suspension system working properly.
It also helps prolong your vehicle’s overall health and performance.
Can Replacing Shocks Improve Overall Vehicle Ride Quality Immediately?
Ever wonder if replacing shocks can instantly improve your ride? Absolutely! Upgrading or replacing your shocks *improves* shock maintenance, which directly boosts overall ride quality, smoothing out bumps and reducing noise.
Suspension upgrades make your vehicle feel more balanced and responsive right away. So, yes, swapping out old shocks refreshes your ride immediately, giving you noticeable comfort and safety benefits without delay.
Conclusion
Replacing your vehicle’s shocks typically takes about 2 to 4 hours, depending on your experience and tools.
Did you know that DIYers often finish the job 30-50% faster with proper preparation? Knowing the steps and factors involved can help you decide whether to do it yourself or hire a pro.
With the right tips and patience, you can save time and money while ensuring a smooth ride and better vehicle handling. When it comes to replacing shocks, being prepared makes all the difference.