How Can You Test a Fuel Pump in Five Simple Steps
Many car owners face the frustrating problem of a malfunctioning fuel pump, leaving you stranded or worried about costly repairs. You’re not alone—understanding how to test your fuel pump can save you time and money.
By tackling this issue yourself, you gain peace of mind and keep your vehicle running smoothly.
To test your fuel pump in five simple steps, start by noticing any signs like difficulty starting or engine stalling. Then, inspect for visible damage and check the electrical connections and relay.
Next, turn the ignition on and listen for a steady whine from the tank, indicating the pump runs.
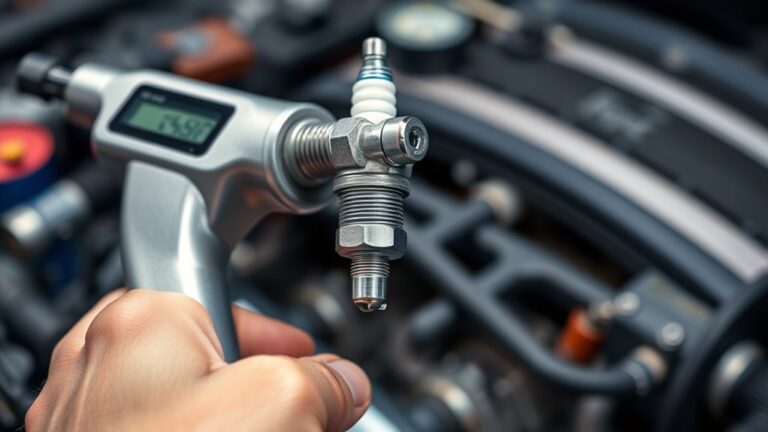
After that, connect a fuel pressure gauge to measure if pressure stays within normal range.
If you want detailed guidance on each step, keep exploring how to guarantee your fuel system stays in top shape.
Key Takeaways
- When you turn the ignition to “ON,” listen closely for a faint whine or hum. That’s usually how you can tell if the fuel pump is running.
- Take a close look at the fuel pump and the wiring around it. Look out for any visible damage, corrosion, or leaks that could be causing issues.
- Grab a multimeter and check the relay for continuity, voltage, and proper electrical connections. It’s a quick way to rule out electrical problems.
- Attach a fuel pressure gauge to the fuel rail. Then, turn your ignition on and see what pressure it reads.
- Finally, compare the pressure reading to your vehicle’s specified range. If it’s within those limits, your fuel pump is likely functioning properly.
Signs Your Fuel Pump Might Be Failing
Your vehicle’s fuel pump is a vital component that can cause a breakdown if it begins to fail. One of the first signs is reduced fuel pump mobility; you might notice difficulty starting your engine or it stalls unexpectedly.
A failing fuel pump can cause difficulty starting or engine stalling unexpectedly.
When the pump struggles, it can’t deliver fuel smoothly, leading to poor acceleration or engine hesitation. You may also hear a whining noise from the pump casing, which could indicate internal wear or pressure issues.
If the pump casing shows signs of corrosion or damage, that’s a sign it’s not functioning properly. Additionally, frequent engine misfires or a drop in overall performance often point to fuel delivery problems.
If you notice these signs, it’s important to address them promptly. Failing fuel pump parts can leave you stranded, so catching early symptoms helps prevent unexpected breakdowns on the road.
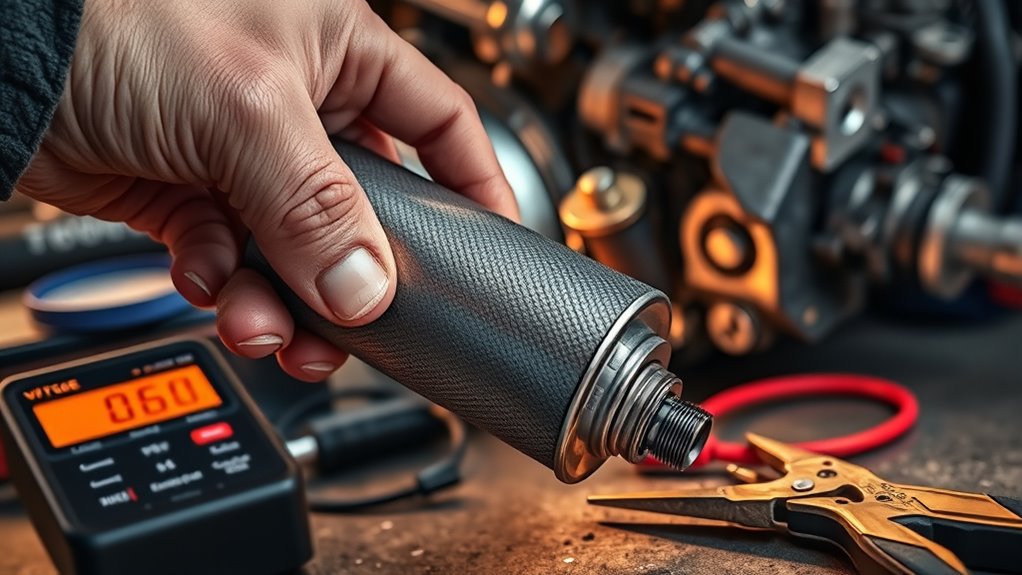
Check for Visible Damage or Wear on Your Fuel Pump
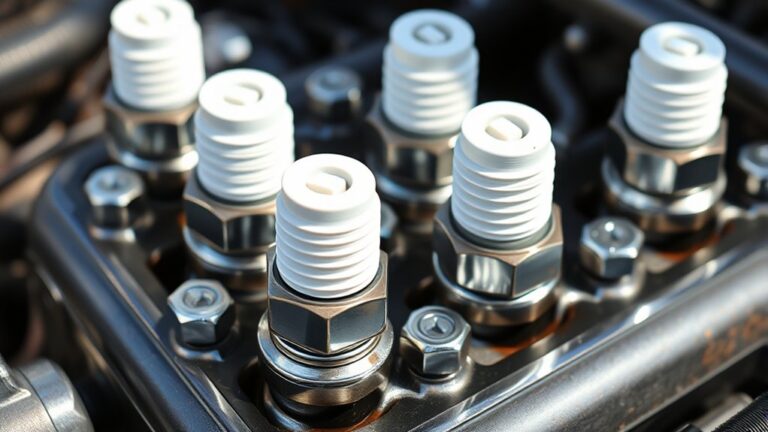
Inspecting your fuel pump for visible damage or wear is a simple way to check how it’s doing. Start by looking at the fuel pump material—check for cracks, corrosion, or leaks on the housing, which could mean it’s deteriorating.
Next, examine the connection points and wiring for fraying, corrosion, or burn marks, as these can point to electrical problems. If you see physical damage or deformed parts on the pump, it might not work efficiently anymore.
Also, take a look at the fuel filters and lines attached to the pump since blockages or debris can put extra stress on it. Keep in mind that external damage isn’t always the full story, but visible wear suggests you should do further testing or consider replacing it.
Staying alert for these visual signs helps you decide whether your fuel pump is in good shape or needs professional attention.
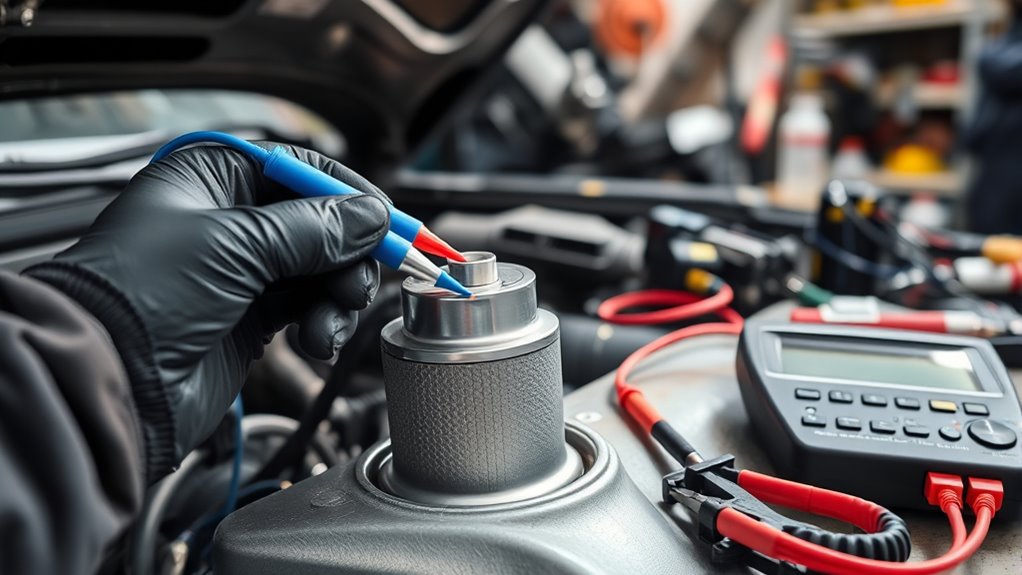
Test the Fuel Pump Relay and Electrical System
To make sure your fuel pump runs reliably, start by checking the fuel pump relay and the vehicle’s electrical system. A faulty relay or weak wiring can lead to poor fuel flow, hurting fuel efficiency and emissions control.
First, locate the relay, which is usually under the hood or in the fuse box. Using a multimeter, test it for continuity and voltage supply. If the relay isn’t working right, replace it.
Also, inspect the wiring for corrosion or damage. Poor connections can disrupt electrical flow and cause issues. Fix or replace any damaged wiring to keep everything running smoothly.
Here’s a quick overview:
| Step | Action |
|---|---|
| 1 | Locate and identify the fuel pump relay |
| 2 | Use a multimeter to test relay for continuity and voltage |
| 3 | Check wiring for corrosion, looseness, or damage |
| 4 | Replace faulty relay or damaged wiring to restore flow |
Keeping your electrical system in good shape helps maintain the best fuel efficiency and keeps emissions under control.
Listen for the Fuel Pump Sound to Confirm It’s Running
Hearing the fuel pump activate is one of the quickest ways to confirm it’s working properly. When you turn the key to the “ON” position (without starting the engine), listen carefully near the fuel tank.
You should hear a faint, steady whine or hum—that’s the fuel pump noise. If you don’t hear anything, it might be an issue with the electrical connections or the pump itself.
Make sure the electrical connections are secure since loose or corroded wires can prevent the pump from running. Sometimes, the sound is subtle, so give your car a few seconds to start up.
If there’s still no noise after that, double-check the fuse and wiring. A consistent fuel pump noise shows it’s getting power and working as it should, giving you a quick confirmation before moving on to more detailed tests.
How to Check Your Fuel Pressure Accurately
So, you’re looking to check your fuel pressure the right way? First off, you’ll want to gather a few essential tools, like a fuel pressure gauge—these are pretty straightforward to find—and don’t forget some safety gear to protect yourself, like gloves and eye protection. It’s always better to stay safe while working with fuel systems!
Next, it’s important to know what the proper fuel pressure range is for your specific vehicle. Every car has its own specs, so taking a quick look at your owner’s manual or a repair guide will help you understand what’s normal. That way, you can tell if something’s off when you’re testing.
Once you’re set, just follow the step-by-step testing process carefully. Taking your time and paying attention to each step will ensure you get accurate and reliable results. No rushing—precision is key here!
Necessary Tools and Equipment
Having the right tools is essential for checking your fuel pressure accurately. Proper equipment guarantees precise readings and helps maintain fuel efficiency and pass emissions tests.
To get started, you’ll need a fuel pressure gauge—the primary tool for measuring pressure. You’ll also need a wrench to detach and connect the gauge securely.
Safety gloves and goggles are important to protect yourself during testing. Plus, a paper towel or rag is handy for cleaning connections and catching any fuel leaks.
Using these tools confidently will help you diagnose issues with your fuel pump effectively. Accurate readings contribute to better fuel economy and lower emissions, keeping your vehicle running clean and efficient.
Having the proper equipment not only simplifies the process but also ensures reliable results for troubleshooting or maintenance.
Proper Fuel Pressure Range
Knowing the correct fuel pressure range is essential for ensuring your fuel pump works properly. If the pressure is too low, your engine might run poorly, waste fuel, and produce more emissions.
On the flip side, if the pressure is too high, it can damage parts and cause rough idling or stalling. Most vehicles recommend pressure between 40 and 60 psi, but check your owner’s manual for the exact numbers.
Keeping the right pressure helps deliver fuel efficiently, promotes good combustion, and keeps emissions in check. Regularly checking that your system stays within this range can stop engine issues and improve overall performance.
Making sure your fuel pump is working correctly through accurate testing supports better fuel efficiency and emission control, leading to a safer, more reliable ride.
Step-by-Step Testing Procedure
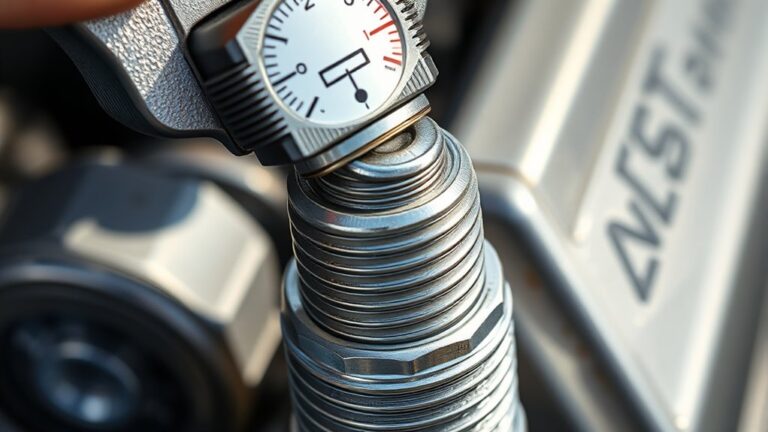
Ensuring accurate fuel pressure testing starts with gathering the right tools and preparing your vehicle properly. First, connect a reliable fuel pressure gauge to the fuel rail or Schrader valve.
Next, turn on the ignition without starting the engine to build pressure in the system. This helps you spot leaks that could affect fuel consumption and engine performance.
Then, check the gauge reading. It should match your vehicle’s specified fuel pressure range.
Finally, turn off the ignition and watch the gauge. The pressure should stay steady or only drop slightly.
This process makes sure you’re testing the fuel pump’s ability to maintain consistent pressure. Proper testing is key for diagnosing issues and ensuring your engine runs smoothly.
What Fuel Pressure Results Mean and When to Seek Help
If your fuel pressure is right on target, your engine should be running smoothly without any hiccups. That’s a good sign that everything’s working as it should. But if you notice the pressure drops too low, it could cause starting problems or make your car struggle with acceleration. Basically, it might be telling you there’s a problem to look into.
And if your readings are way off, or if you start noticing other issues like stalling or inconsistent performance, it’s a good idea to get it checked out by a professional. Don’t wait too long—getting help early can save you from bigger (and pricier) repairs down the road.
Optimal Pressure Levels
Have you ever wondered what your fuel pressure readings say about your vehicle’s health? The ideal fuel pressure usually falls between manufacturer-specified ranges, often around 40–55 psi.
If your readings are too high or low, it might be a sign of issues like a failing fuel pump or aftermarket parts not working correctly. Here’s what different readings could mean:
Too high: Possible fuel pump corrosion causing blockages.
Too low: A weak or failing fuel pump.
Fluctuating: Inconsistent pressure, which could point to connection issues or worn-out components.
Within range: Generally indicates a healthy fuel system, but keep an eye on symptoms if they linger.
Signs of Low Pressure
Noticing that your engine runs rough, hesitates, or stalls during acceleration? These can be signs of low fuel pressure.
When pressure drops below the recommended level, your vehicle’s performance suffers, often leading to poor acceleration and sluggish response. Low fuel pressure can also reduce fuel efficiency, causing you to burn more gas without gaining any power.
If you keep noticing these symptoms, it might be a failing fuel pump or a clogged fuel filter. Ignoring them could cause more damage to your engine or higher emissions.
Checking your fuel system’s pressure levels can help spot the issue early. Fixing it promptly ensures your vehicle runs smoothly and stays in peak condition.
When to Seek Assistance
Understanding your fuel pressure test results is key to knowing if your fuel pump is working properly. If your readings are outside the recommended range, it can affect fuel efficiency and emissions.
Knowing when to get help is important. If your readings stay low or high even after testing, or if your engine stalls, idles roughly, or is hard to start, it’s time to seek professional advice.
You should also watch out for noticeable drops in fuel efficiency or if your emission warning lights turn on. These signs mean you should have your vehicle checked by a professional.
Ignoring abnormal results can lead to bigger problems like poor mileage and emission system failure. Getting expert help ensures your vehicle runs safely, efficiently, and meets emission standards.
Common Fuel Pump Testing Mistakes to Avoid
When testing a fuel pump, it can be easy to overlook common mistakes that lead to inaccurate results or even damage. One major error is rushing through the process, which might cause you to miss subtle signs of failure that could shorten the pump’s lifespan or boost replacement costs.
Rushing testing can cause missed signs of failure, risking damage and costly repairs. Take your time for accurate results.
Another frequent mistake is using the wrong testing equipment or skipping important troubleshooting steps. This can risk damaging the pump or causing a misdiagnosis.
Finally, neglecting safety precautions can lead to accidents or false readings. Always wear safety gear and work in well-ventilated areas to stay safe.
Avoiding these mistakes can help you extend your fuel pump’s life and save money on repairs.
Preventive Tips for Fuel Pump Maintenance
Regularly maintaining your fuel pump is key to keeping it working smoothly and lasting longer. Taking care of it also boosts fuel efficiency and helps keep emissions low, so your vehicle runs cleaner.
Here are four simple tips to help you stay on top of fuel pump health:
- Use quality fuel. Poor-quality fuel can clog your pump and filter, which can lower performance and increase emissions.
- Change the fuel filter regularly. A clean filter makes sure fuel flows properly, reducing stress on the pump and keeping your car running well.
- Keep the tank at least a quarter full. This helps prevent the pump from overheating and wearing out too soon.
- Avoid aggressive driving. Sudden starts and stops put extra strain on the fuel pump and can shorten its lifespan while also affecting emissions.
Troubleshooting Fuel Pump Issues Step-by-Step
If your vehicle isn’t starting properly or running smoothly, it might be time to troubleshoot your fuel pump.
Start by listening for a whining sound from the tank when you turn the key—this usually means the pump is working.
Listen for a whine from the tank when you turn the key—that indicates your fuel pump might be working.
Next, check your fuel pressure with a gauge. Low or inconsistent pressure suggests there could be a problem with the fuel pump.
It’s also worth inspecting the fuel filter for clogs since a blocked filter can make it seem like the pump is failing.
Poor fuel quality can affect fuel efficiency and hide pump issues, so always use fresh, high-quality fuel.
You might notice stalling, hesitation, or surges, which are common signs of fuel pump trouble.
If these issues still happen after checking the basics, test the electrical connections to see if the pump is getting power.
Proper troubleshooting helps you find the real problem and avoid unnecessary replacements, saving you time and money.
When to Replace Your Fuel Pump
Knowing when to replace your fuel pump is key to avoiding those annoying breakdowns and expensive repairs. If your car starts sputtering, has trouble starting, or seems to sip fuel more than usual, those could be signs it’s time to take action. Catching these signs early can save you a lot of hassle down the road.
Basically, paying attention to how your car behaves can help you figure out if the fuel pump is on its way out. When you notice these issues, don’t ignore them—getting it checked out and replaced when needed keeps your ride running smoothly and reliably.
Signs of Fuel Pump Failure
Are you noticing your vehicle struggling to start or stalling unexpectedly? These signs often point to a failing fuel pump. To pinpoint issues, look for these indicators:
- Reduced fuel efficiency, meaning your car is using more fuel than usual.
- Sudden loss of power, especially during acceleration.
- Engine sputtering or misfiring at high speeds.
- Trouble starting the engine, even after multiple attempts.
A failing fuel pump can also mess with your emission controls, leading to increased pollutants. If you notice these symptoms, it’s a sign you need to consider replacing your fuel pump soon.
Ignoring these warning signs can lead to worse performance and potential damage to other parts.
Trust your vehicle’s cues and stay ahead of serious issues.
Proper Replacement Timing
Wondering when to replace your fuel pump? If you notice decreased fuel efficiency or higher emissions, it might be a sign your pump is failing and needs to be replaced.
Don’t wait until your vehicle stalls or struggles to start, as those are late indicators. Replacing it early helps keep emissions in check and your engine running smoothly.
Most fuel pumps last between 100,000 to 150,000 miles, but that can vary depending on your driving habits and fuel quality. Regular maintenance and watching for warning signs can help you catch issues early.
Replacing the pump proactively protects your vehicle’s performance, fuel economy, and emissions standards. Trust your mechanic’s advice and don’t hesitate to get it checked when symptoms appear.
Frequently Asked Questions
Can I Test My Fuel Pump Without Professional Tools?
You can try testing your fuel pump without professional tools by listening for the fuel pump motor noise when you turn the key. That’s a common sign that the pump is working.
You might also check the fuel pressure if you have a basic fuel pressure gauge available. It can give you an idea if the pump is generating the right pressure.
But for a more accurate diagnosis—especially if you’re still having issues—it’s best to use proper tools like a multimeter. If you’re unsure, it’s a good idea to call in a professional to avoid any misdiagnosis.
How Often Should I Perform Fuel Pump Tests?
You should test your fuel pump every 30,000 to 50,000 miles, based on your vehicle’s recommended lifespan. Regular testing helps catch issues early before they cause breakdowns.
If you notice symptoms like difficulty starting or engine stalling, it’s a good idea to test sooner. Consistent checks make sure your fuel pump performs well and lasts longer.
Staying proactive with testing keeps your vehicle running smoothly and can prevent unexpected failures.
Are There DIY Methods to Extend My Fuel Pump’s Lifespan?
Yes, you can extend your fuel pump’s lifespan with some DIY tips. Regularly changing or maintaining your fuel filter helps prevent debris from stressing the pump.
Also, check your electrical system to make sure connections are solid and the voltage is correct. This prevents the pump from failing early due to electrical issues.
These simple steps help keep your fuel pump in good shape, boost performance, and save you money on repairs. Just stay consistent with your maintenance and do regular checks.
What Safety Precautions Are Necessary When Testing a Fuel Pump?
Think of testing your fuel pump like walking a tightrope; safety is your safety net. You need to focus on electrical safety by disconnecting the battery and wearing insulated gloves to prevent sparks or shocks.
Handle flammable substances with care. Keep open flames away and work in a well-ventilated area. Always follow the manufacturer’s guidelines and use the right tools for the job.
These precautions protect you from hazards and help ensure a safe, successful test.
How Does Fuel Quality Affect Fuel Pump Performance?
Fuel quality directly impacts your fuel pump’s performance. When fuel gets contaminated with dirt, water, or debris, it can clog the filter and make the pump work harder, which reduces its efficiency.
Poor-quality fuel can cause engine misfires, hesitation, or even stalling. To keep your fuel pump running smoothly, always use clean, high-quality fuel.
It’s also a good idea to change your filters regularly. This helps prevent contamination and keeps your pump functioning properly, saving you from costly repairs down the road.
Conclusion
Think of your fuel pump as the heartbeat of your car’s journey, keeping your engine alive and thriving. When it starts to falter, your vehicle’s rhythm can slow down or stop altogether.
By learning how to test it, you’re not just fixing a part—you’re protecting your adventure and making sure your rides are smooth. Early troubleshooting can save you time and money down the road.
Stay vigilant and check your fuel pump regularly. Keeping that heartbeat steady means ensuring every trip feels effortless, without unpredictable stalls or rough starts.
Your car’s rhythm depends on your care, so take a moment to learn how to test your fuel pump in five simple steps. It’s the best way to keep your engine running strong and your journeys worry-free.