
How Do You Test a Fuel Sending Unit in 10 Simple Steps
If you’re trying to keep your vehicle running smoothly, one common hassle is dealing with a faulty fuel sending unit. Many people struggle with inaccurate fuel gauges or mysterious fuel issues, but don’t worry—you’re not alone.
Testing the fuel sending unit can seem tricky, but with a few simple steps, you can identify if it’s time for a replacement.
To test your fuel sending unit in 10 simple steps, start by gathering your tools and ensuring safety precautions are in place. Access the unit carefully, then check the electrical connections for damage or corrosion.
Use a multimeter to measure resistance and verify it varies with fuel level. Inspect inside the tank for debris or damage and interpret your readings to identify issues.
If something seems off, you’ll find tips here to troubleshoot and know when to replace.
Key Takeaways
- Disconnect the fuel sender’s electrical connector and remove it from the tank safely.
- Use a multimeter to measure the sender’s resistance and check if it changes with the float’s movement.
- Inspect the wiring for damage, corrosion, and ensure the ground connection is proper before testing.
- Move the float manually or adjust the sender to see if the resistance readings change accordingly.
- If the readings are inconsistent, static, or outside the specified resistance range, replace the sender.
How Does a Fuel Sending Unit Work in Your Vehicle?
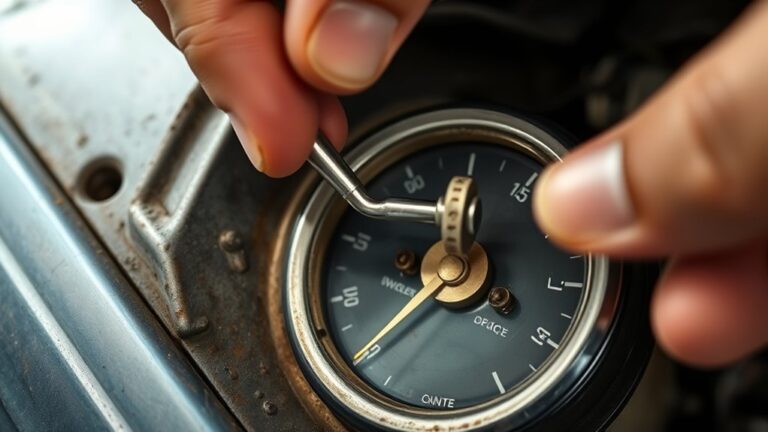
Ever wondered how your vehicle knows how much fuel is in the tank? It’s all thanks to the fuel sending unit. This part measures fuel level accuracy by using a float attached to a metal arm connected to a sender.
As the fuel level changes, the float moves up and down, causing the sender to fluctuate. Inside, a variable resistor adjusts with the float’s position, sending signals that a gauge interprets to display the fuel level.
Proper sending unit calibration is crucial to guarantee you’re getting accurate readings. If the calibration is off, your fuel gauge could show less or more than you actually have. Regular checks and adjustments help maintain precision.
When working properly, the sending unit provides reliable data to prevent running out of gas unexpectedly. It helps you keep track of your fuel consumption, making sure you always know your fuel level.
In short, it’s an essential part of your vehicle’s fuel system, ensuring you stay informed about your fuel.
Gather Tools and Safety Equipment for Testing
Before you start testing your fuel sending unit, make sure you have the right tools and safety gear. Proper preparation is key to a smooth and safe process.
Ensure you have the proper tools and safety gear before testing your fuel sending unit for a safe, accurate process.
You’ll need a multimeter to check electrical signals and how the sender is calibrated. Also, wear safety goggles and gloves to protect yourself from fuel fumes and spills.
Have a test light or ohmmeter handy for checking wires and connections. Using properly calibrated tools helps you identify issues that could affect your fuel gauge accuracy.
Keep a clean cloth and a container nearby for any spills. This keeps things tidy and safe while working. Being prepared ensures a safe environment and helps you accurately diagnose the sender’s condition.
Taking these steps helps you determine if the sender needs repair or replacement, ensuring your fuel gauge works correctly.
Safely Access the Fuel Sending Unit in Your Tank
To safely access the fuel sending unit in your tank, you need to take proper precautions to prevent accidents or damage. Start by ensuring your workspace is well-ventilated and free of ignition sources, as fuel vapors are highly flammable.
Follow proper fuel tank safety protocols, including wearing gloves and eye protection. Before opening the tank, disconnect the vehicle’s battery to avoid sparks and electrical issues.
Carefully remove or loosen the fuel cap to release any pressure built up inside. Use a jack or stands to raise the vehicle if necessary, and make sure it’s stable.
When accessing procedures, locate the tank’s access panel or remove the tank itself if needed. Be gentle when handling components to avoid damaging the tank or sending unit.
Taking these steps will help you access your fuel sending unit safely while maintaining fuel tank safety throughout the process.
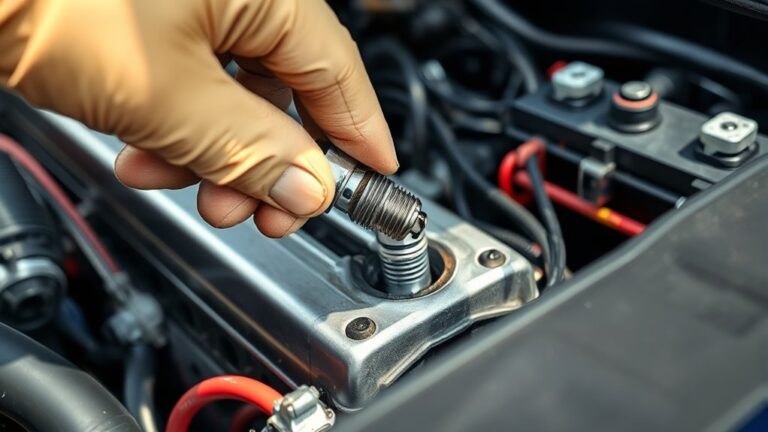
Check the Electrical Connections of the Fuel Sending Unit
First off, take a good look at the wiring around the fuel sending unit. Check for any damage, cracks, or corrosion because these can mess with the signals it sends. If the wires look worn out or dirty, it’s a good idea to clean or replace them to get a clear reading.
Next, make sure the ground connection is solid. It should be tight and free of rust, dirt, or anything that might cause a poor connection. A bad ground can really throw off the measurements, so double-check that it’s secure.
Finally, don’t forget to verify the power supply to the unit. It needs to have a steady and proper voltage to work correctly. If the power isn’t stable or if there’s a problem there, it could lead to inaccurate fuel level readings. So, ensuring the power source is working well is just as important.
Inspect Wiring for Damage
Inspecting the wiring for damage is a key step in diagnosing the fuel sending unit. Damaged or frayed wires can lead to inaccurate sensor readings and poor electrical grounding, which affects the fuel gauge.
Start by examining the wiring harness for visible cuts, corrosion, or burnt spots that could disrupt electrical flow. Make sure all connectors are firmly attached; loose or corroded connections can cause faulty readings.
Use a multimeter to verify continuity along the wires, ensuring they conduct electricity properly. If you find any damaged wiring, replace or repair it to keep the sensor calibrated correctly.
Proper electrical grounding is vital for accurate fuel level readings. Double-check that all ground connections are secure and intact to maintain reliable operation.
Check Ground Connection
Have you confirmed that the ground connections of your fuel sending unit are secure and free of corrosion? A solid ground connection is essential for accurate readings.
Check the grounding wire and make sure it’s tightly attached to a clean, unpainted metal surface on the vehicle’s frame or body. Look for signs of corrosion or rust, which can disrupt electrical flow.
If you notice corrosion, remove it with a wire brush and reattach the wire securely. Regular corrosion prevention, like applying dielectric grease or a corrosion inhibitor, helps keep the ground connection reliable.
A clean, tight, and corrosion-free ground ensures consistent signals from your fuel sending unit and prevents false readings. Proper grounding is a simple step that can save you time and trouble.
Test Power Supply Properly
Before testing the power supply, make sure the electrical connections to the fuel sending unit are secure and free of damage. Faulty connections can disrupt the whole fuel system, making it hard to get accurate readings.
To verify proper electrical troubleshooting, start by inspecting all wiring for corrosion, fraying, or loose terminals. Use a multimeter to check for voltage at the power supply terminal during key-on.
Make sure the grounding connection is solid and free of rust or corrosion. If you don’t see voltage or get inconsistent readings, troubleshoot the wiring and fuses tied to the fuel system.
Properly testing the power supply helps identify electrical issues, ensuring the fuel sending unit works correctly and preventing unnecessary replacements.
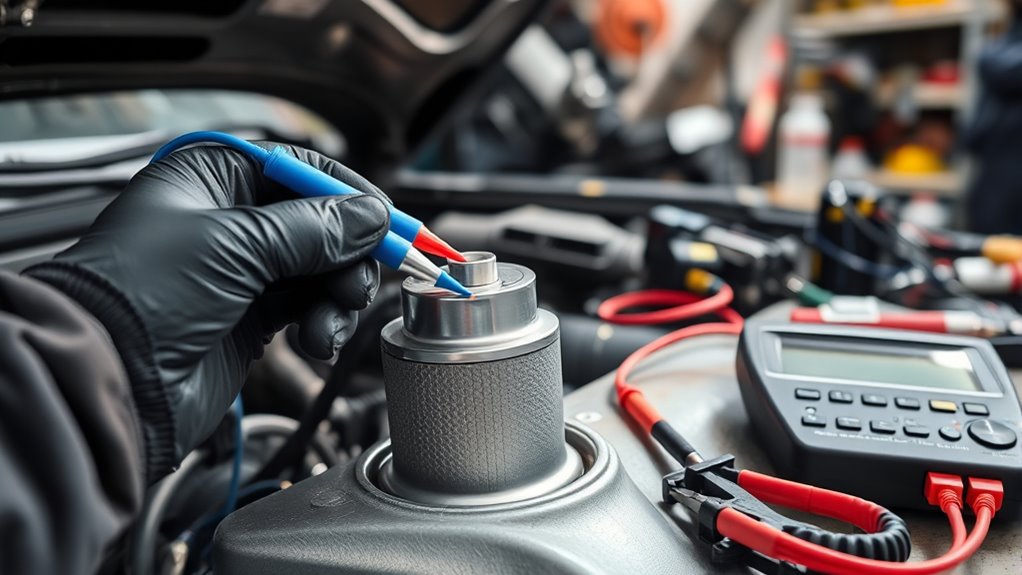
Measure Resistance of the Fuel Sending Unit
To measure the resistance of the fuel sending unit accurately, you’ll need a digital multimeter set to the appropriate ohms range. First, disconnect the sending unit from the fuel tank to expose the terminals.
Place the multimeter probes on the sender’s terminals—red to one, black to the other. You should see a resistance reading that varies with the fuel level.
If resistance stays constant or is outside the manufacturer’s specified range, it indicates a faulty sending unit. This measurement is essential for proper fuel gauge calibration, ensuring your gauge reads correctly.
If the resistance is too high or infinite, the unit may need a sending unit replacement. Accurate resistance testing helps rule out wiring issues and confirms whether the sensor itself is defective.
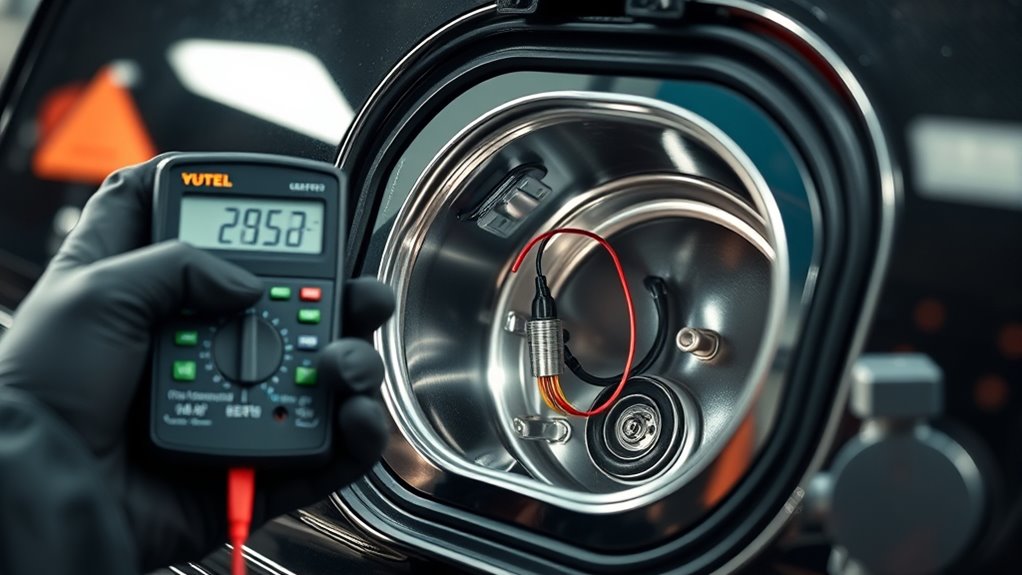
Test the Sensor’s Continuity With a Multimeter
To test the sensor’s continuity, grab your multimeter and set it to the continuity mode. It’s pretty straightforward — just touch the probes to the sensor terminals and the wiring connections. If everything’s good, your multimeter will beep or show a reading, letting you know the wiring’s intact.
But if you don’t hear a beep or see any reading, that probably means there’s a break somewhere in the wiring. It’s a quick way to figure out if your sensor’s wiring is still good to go!
Set Multimeter To Continuity
Setting your multimeter to the correct setting is crucial for checking the fuel sending unit’s continuity. This helps ensure you get accurate readings, especially with vintage vehicle sensors or when calibrating your fuel gauge.
To do this, turn the multimeter dial to the *continuity* or *diode test* setting, usually marked by a sound wave or diode symbol. This tells the multimeter you’re testing for electrical continuity.
Next, confirm the multimeter works by touching the probes together; it should beep or display zero resistance. This step makes sure your device is ready for an accurate test.
Handle the probes carefully to avoid damage, and prepare to test the sensor’s wiring and internal components. Proper setup is key to measuring the actual electrical path within the fuel sending unit.
Following these steps helps spot issues in vintage sensors and ensures your fuel gauge reads correctly. Accurate setup means reliable readings every time.
Check Sensor Wiring
Before testing the wiring, disconnect the fuel sending unit from the vehicle’s electrical system to prevent false readings or shorts.
Start by inspecting the wiring harness for any visible damage or corrosion. Use a multimeter to check the continuity of the sensor wiring.
Place the probes on the wires connecting the sensor to the vehicle, making sure they have a secure contact. If the multimeter beeps or shows a low resistance, the wiring is good.
If not, you might have a broken wire or a loose connection. Remember, good wiring is essential for proper sensor calibration and accurate fuel level readings.
Fix any damaged wiring before moving on to further tests. Confirm the wiring’s integrity now to ensure the sensor signals are correctly sent to your vehicle’s gauge.
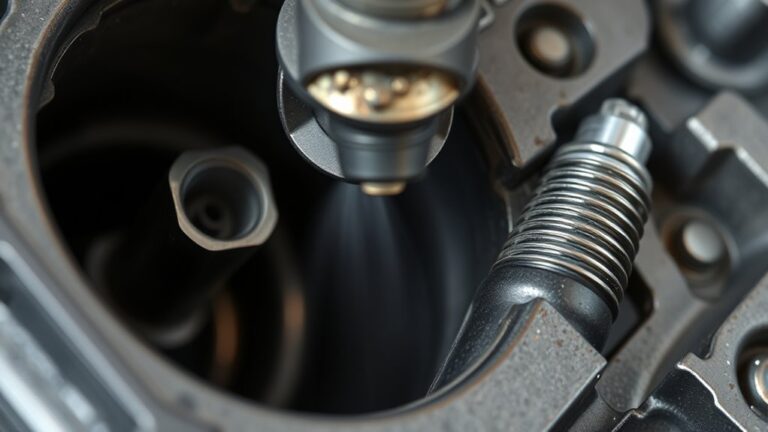
Inspect the Fuel Tank and Sending Unit for Damage or Debris
Inspecting the fuel tank and sending unit for damage or debris is a key step when testing your fuel sending unit. Start by carefully opening the fuel tank, making sure to follow safety precautions.
Focus on looking for debris: rust, dirt, or sediment that could clog the bottom or mess with the readings. Next, check inside the tank for cracks, corrosion, or any damage that might affect the sensor.
Finally, examine the sending unit itself for broken wires, loose connections, or physical damage to the float arm. Regularly inspecting for debris and damage helps ensure accurate fuel level readings and avoids bigger issues down the line.
How to Interpret Resistance and Continuity Test Results?
Understanding how to interpret resistance and continuity test results is key to diagnosing a faulty fuel sending unit.
Resistance readings show how well the electrical signal flows through the unit, which affects the fuel gauge calibration.
Continuity tests confirm if the electrical wiring is intact. Here’s how to understand the results:
| Resistance Reading | What It Means |
|---|---|
| Low (Close to 0 ohms) | Good contact, accurate fuel level readings |
| High or Infinite | Broken wiring or damaged sending unit |
| Continuity Test | What It Means |
| Continuity present | Wiring is OK, and the unit is functioning properly |
| No continuity | Open circuit, fault in wiring or the sending unit |
Interpreting these results correctly helps you identify issues that affect fuel gauge accuracy. This ensures your gauge displays the right level and wiring remains intact.
Troubleshoot Common Problems if the Fuel Sending Unit Fails
When a fuel sending unit fails, it can cause your fuel gauge to become inaccurate or even stick, making it tough to tell how much fuel you really have. Common problems often come from debris, corrosion, or electrical issues.
To troubleshoot, start by checking for fuel system cleanliness. Contaminants or sediment can interfere with the sending unit’s movement and affect accuracy.
Next, inspect the wiring and connections. Loose or corroded wires can disrupt signals, causing the gauge to be unreliable or stuck.
Finally, test the sending unit with a multimeter. Verify that the resistance is within specs—an abnormal reading suggests it’s failing.
Fixing these issues helps keep your fuel system clean and ensures your gauge shows the right fuel level. Identifying and fixing problems now can prevent misreadings later.
When Should You Replace Your Fuel Sending Unit?
A good time to replace your fuel sending unit is when it keeps giving inaccurate readings despite having clean wiring and no visible damage. If your fuel gauge swings unpredictably or gets stuck on empty or full, it can hurt your fuel efficiency and make it hard to tell how much fuel you really have.
Inaccurate fuel readings can also mess with your car’s emissions control. This can lead to improper engine adjustments and affect how clean your vehicle runs. If these issues keep happening even after troubleshooting, it’s a sign the sending unit isn’t working right anymore.
Replacing it ensures you get reliable fuel gauge readings, which helps you save fuel and avoid running out unexpectedly. Plus, a functioning unit provides accurate data to your engine control system, supporting proper emission controls.
Don’t ignore ongoing gauge problems. Replacing the fuel sending unit on time can prevent more serious engine issues and keep your vehicle running smoothly. Regular testing of your fuel sending unit helps you catch the right moment for replacement.
Frequently Asked Questions
Can a Faulty Fuel Sending Unit Cause Your Vehicle Not to Start?
Yes, a faulty fuel sending unit can cause your vehicle not to start, especially if it affects fuel gauge accuracy or electrical diagnostics.
When the sending unit malfunctions, it may send incorrect signals to the fuel gauge, making you think there’s enough fuel when there isn’t.
This can lead to fuel delivery issues that prevent your vehicle from starting.
Conducting electrical diagnostics helps identify if the sending unit’s failure is the culprit.
What Are Signs of a Failing Fuel Sending Unit?
If your fuel gauge shows inconsistent readings or stays on empty or full despite fueling, these are signs of a failing fuel sending unit.
You might also notice the gauge isn’t accurate or it fluctuates often. To check it out, locate the sending unit—it’s usually inside the fuel tank—and inspect it.
A malfunctioning sending unit often happens because of wiring problems or a dirty, worn-out part. This causes the fuel level readings to be off.
Is It Safe to Test the Fuel Sending Unit Without Draining the Tank?
Verdant and delicate, your fuel tank is like a quiet garden needing care. Testing procedures without draining the tank can be safe if you follow strict tank safety protocols, but it’s not foolproof.
The risk of spills or vapors igniting makes draining the tank the recommended approach. Prioritize safety over convenience to avoid hazardous surprises.
Always consult your vehicle’s manual or a professional before proceeding with testing procedures.
How Often Should the Fuel Sending Unit Be Inspected or Replaced?
You should check your fuel sending unit during your regular maintenance schedule.
Typically, inspection is recommended every 30,000 miles or if you notice inaccurate fuel readings.
Replacement frequency depends on your vehicle and driving conditions but generally occurs every 100,000 miles or when malfunction symptoms appear.
Regular inspections help you catch issues early, keeping your fuel gauge reliable and your vehicle running smoothly.
Are There Specific Vehicles That Require Different Testing Procedures?
You might wonder if vehicle compatibility affects testing procedures. Research shows that testing variations are common because different makes and models have unique fuel sending units.
Some vehicles, especially older or specialty models, need specific steps or tools for accurate testing. Always check your vehicle’s service manual or manufacturer guidelines.
This helps ensure you’re correctly evaluating the fuel sending unit, which reduces the risk of incorrect diagnostics.
Conclusion
Now that you know how to test your fuel sending unit, you can confidently diagnose issues and spot any damage or defects. Don’t delay making a clear assessment—get into the details, detect deviations, and decide when it’s time for a replacement.
With careful calibration and keen examination, you can prevent fueling problems from piling up. Proper testing helps you stay ahead of costly repairs and keeps your car running smoothly.
Confidence comes from your thorough, honest check. Testing your fuel sending unit is a crucial step in maintaining your vehicle’s health.